• Hello!
  • Shop
  • License This!
  • Portfolio
  • they said what?!
  • Press
  • Contact
  • New Products
  • Journal
  • Life List
  • Links

Marissa Huber

I Create Playful Art to Infuse Sunshine into Your Life

  • Hello!
  • Shop
  • License This!
  • Portfolio
  • they said what?!
  • Press
  • Contact
  • New Products
  • Journal
  • Life List
  • Links

Watercolor Tutorial: How to Use Masking Fluid

I haven't done a tutorial since my 55 step Print Gocco Tutorial in 2008. I think it's time for some new ones! I fell in love with watercolor around 2001, when I started using them instead of markers to separate my presentation renderings from conceptual ones for interior design projects in college. I also worked at a wonderful independently owned art store, Pygmalion's Art Supply in Bloomington, Indiana, where I got to learn so much and enable others to buy art supplies daily.

Today we're going to focus on Masking Fluid, and how you can use it for your paintings. There are tons of details, and hopefully you can learn from some of my trials and errors over the years.

Watercolor-Tutorial-Masking-Fluid-Marissa-Huber


 What is Masking Fluid? Why is it Useful?

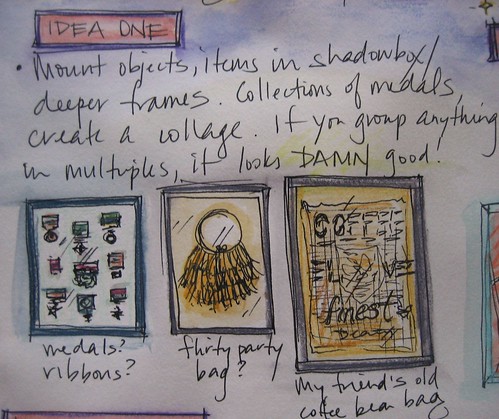
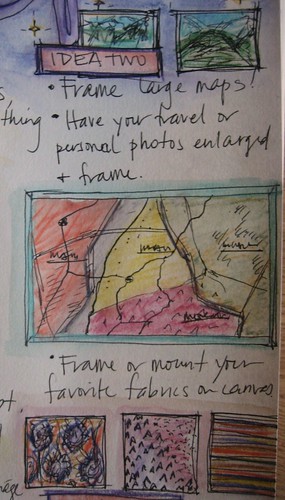
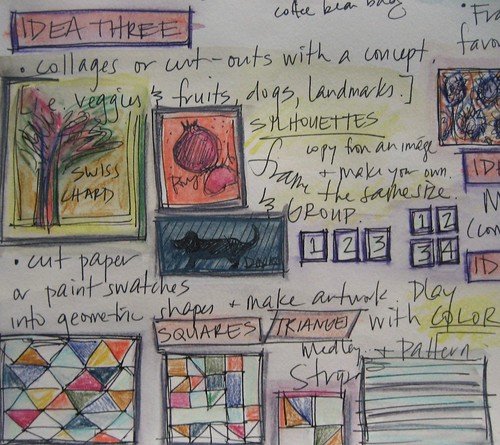
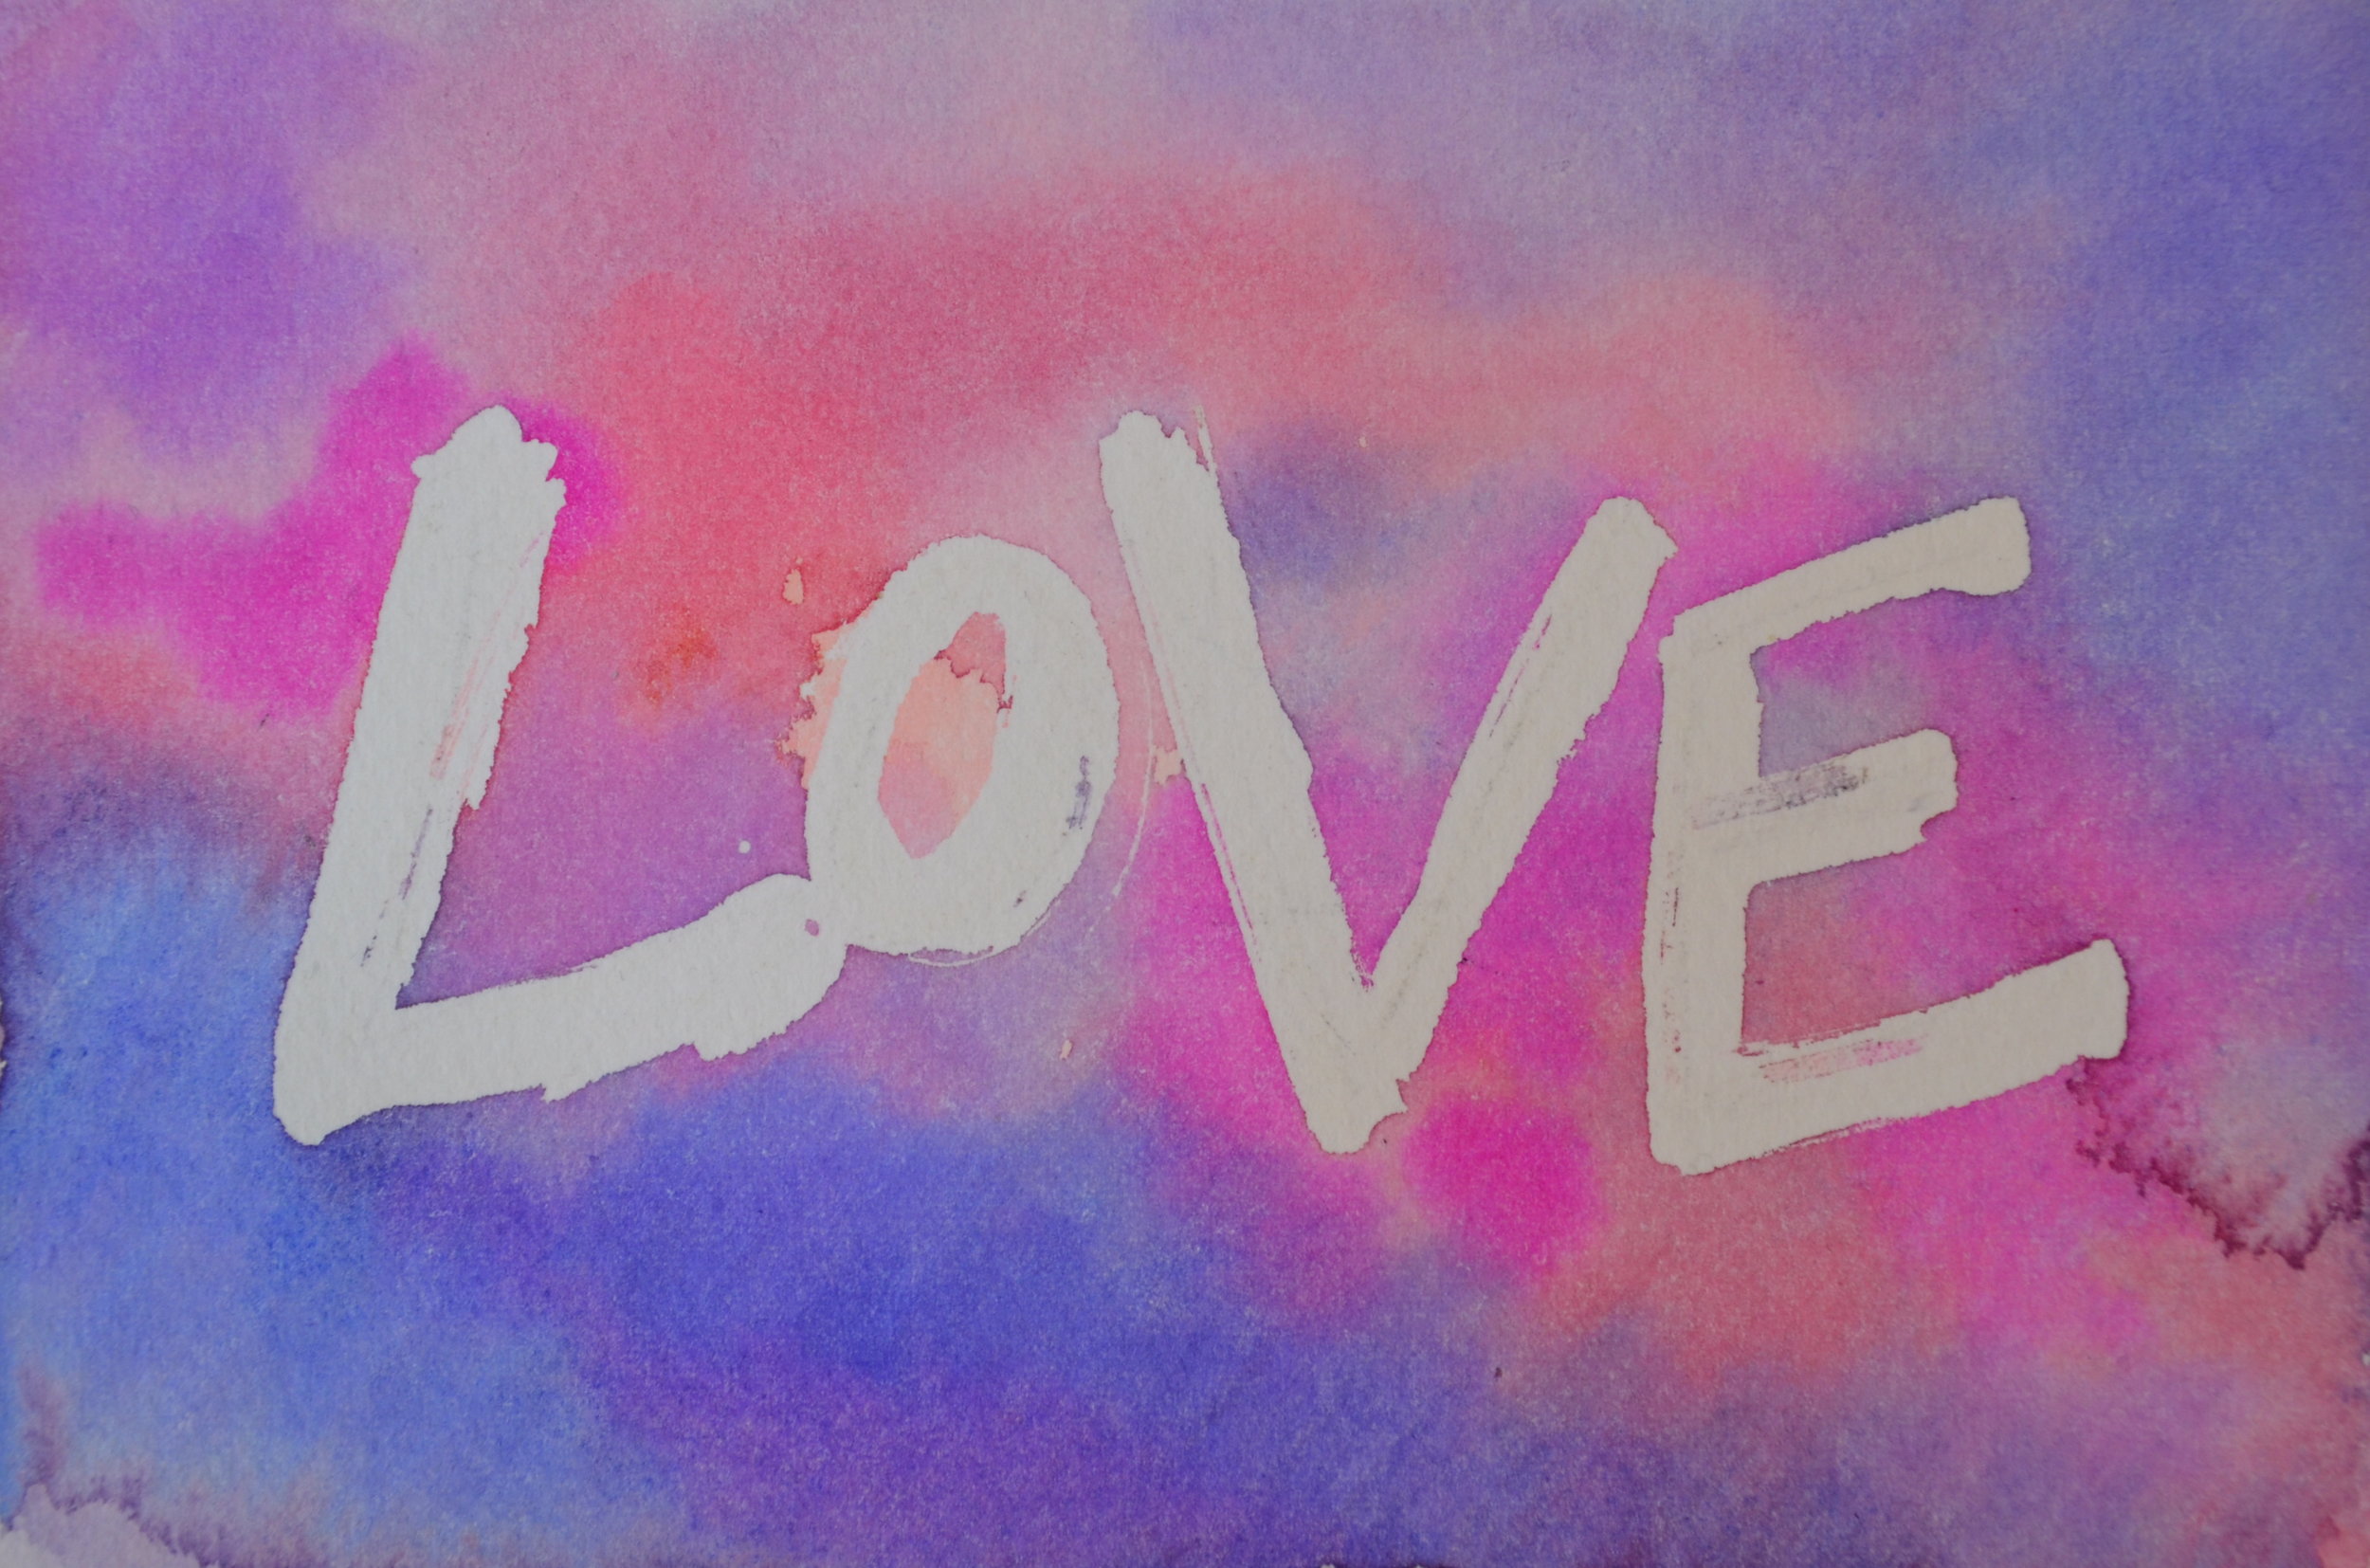
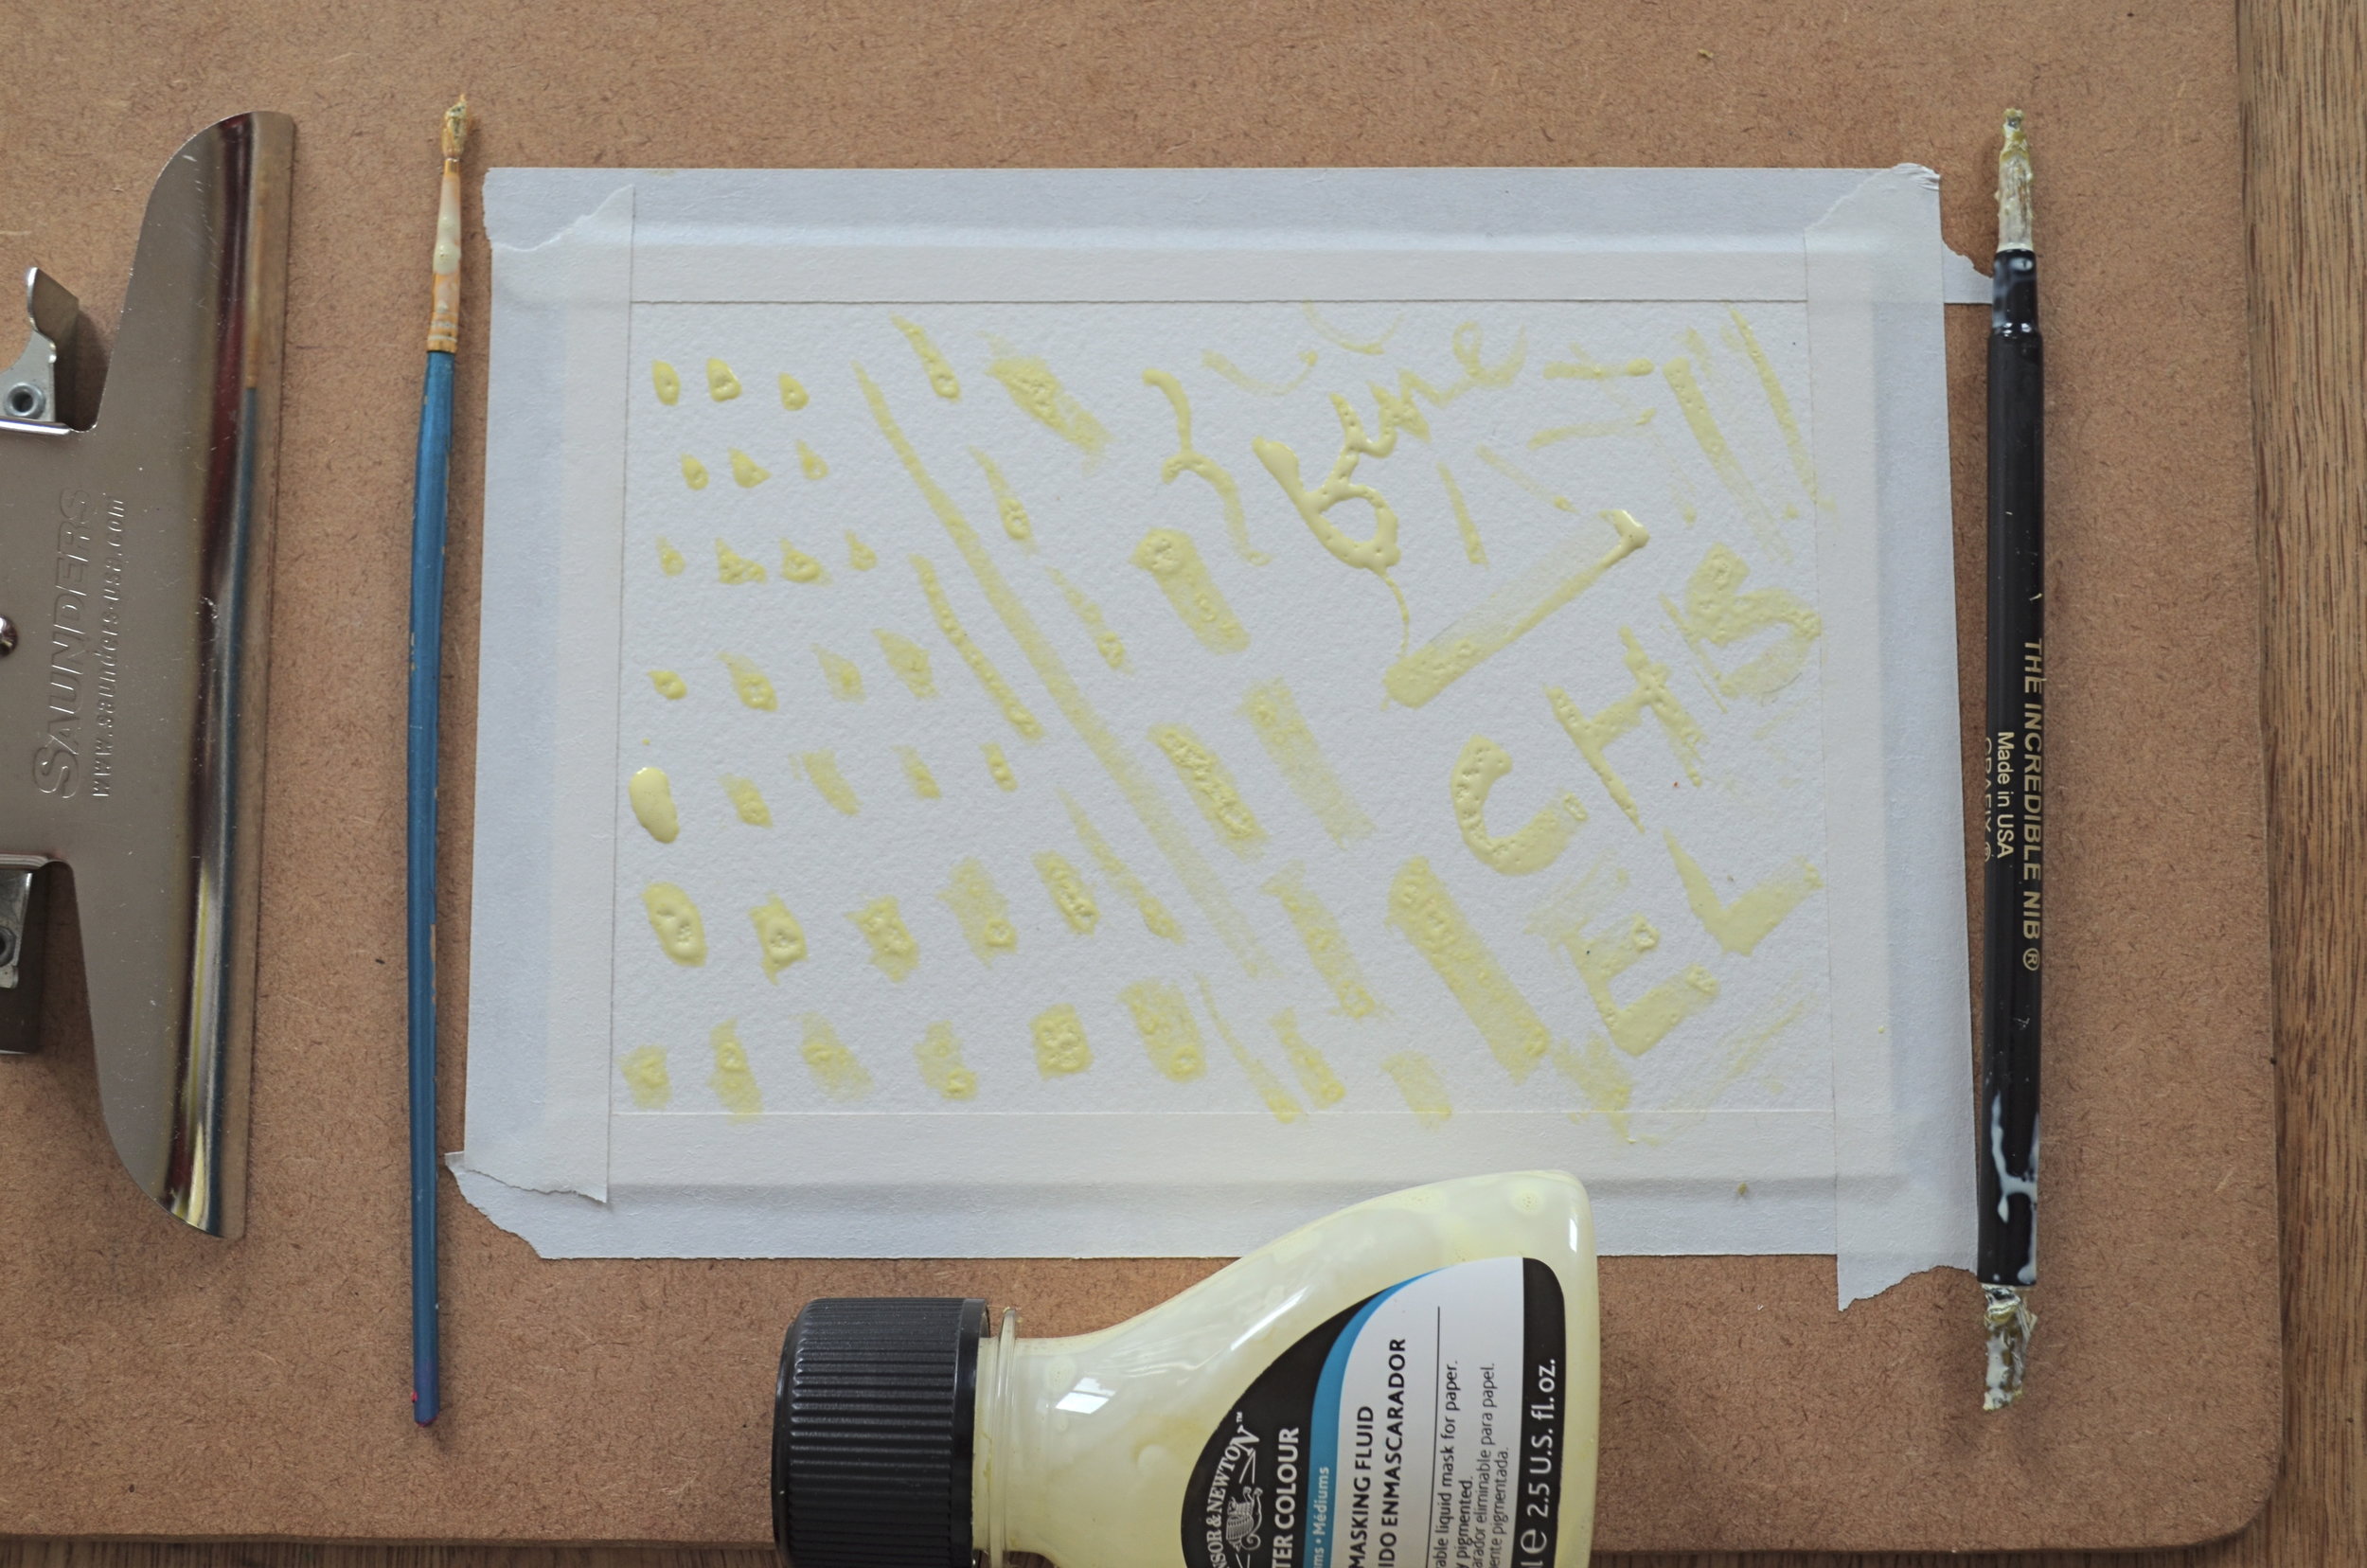
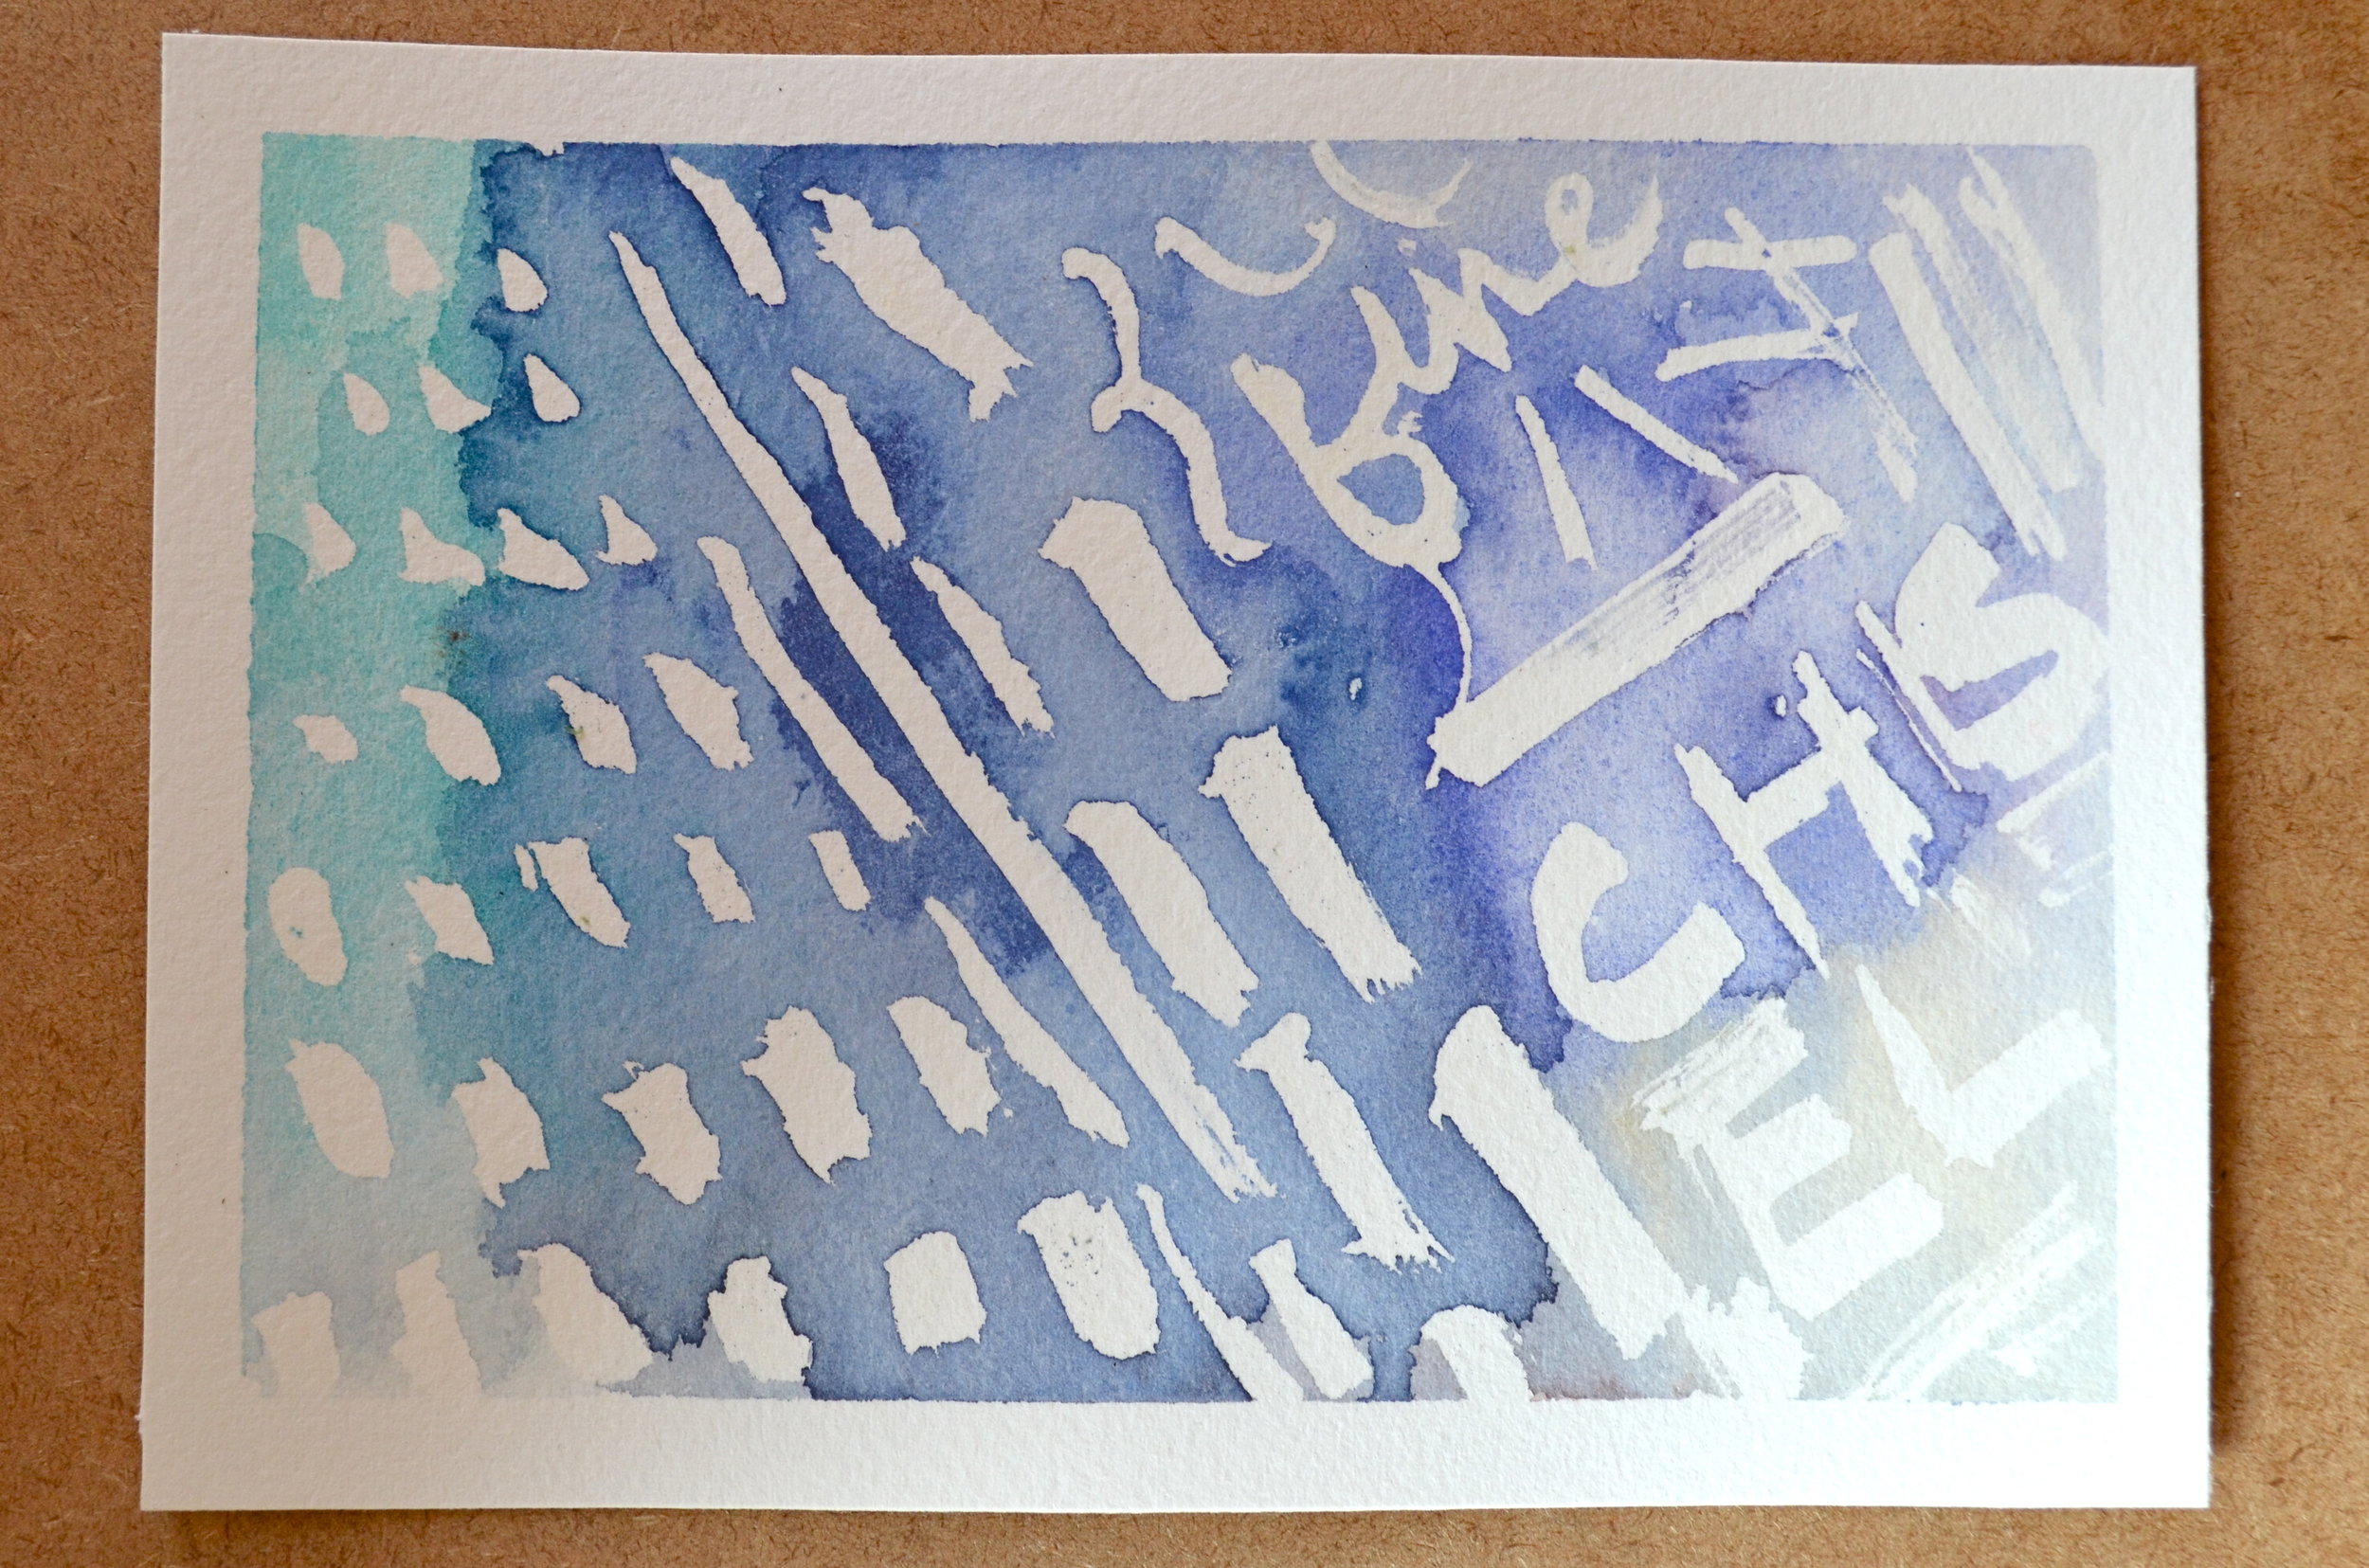
Masking fluid may be used when you want to preserve white areas of your paper while painting. It is a rubbery liquid that is applied on the paper, and when it dries, creates a temporary seal between the paper and paint. Think of it like the rubber bands around a tie-dyed project, or blue painters tape around your windows when painting your living room.  I treat masking fluid as another tool in my technical arsenal. It can be used in a variety of ways, including:

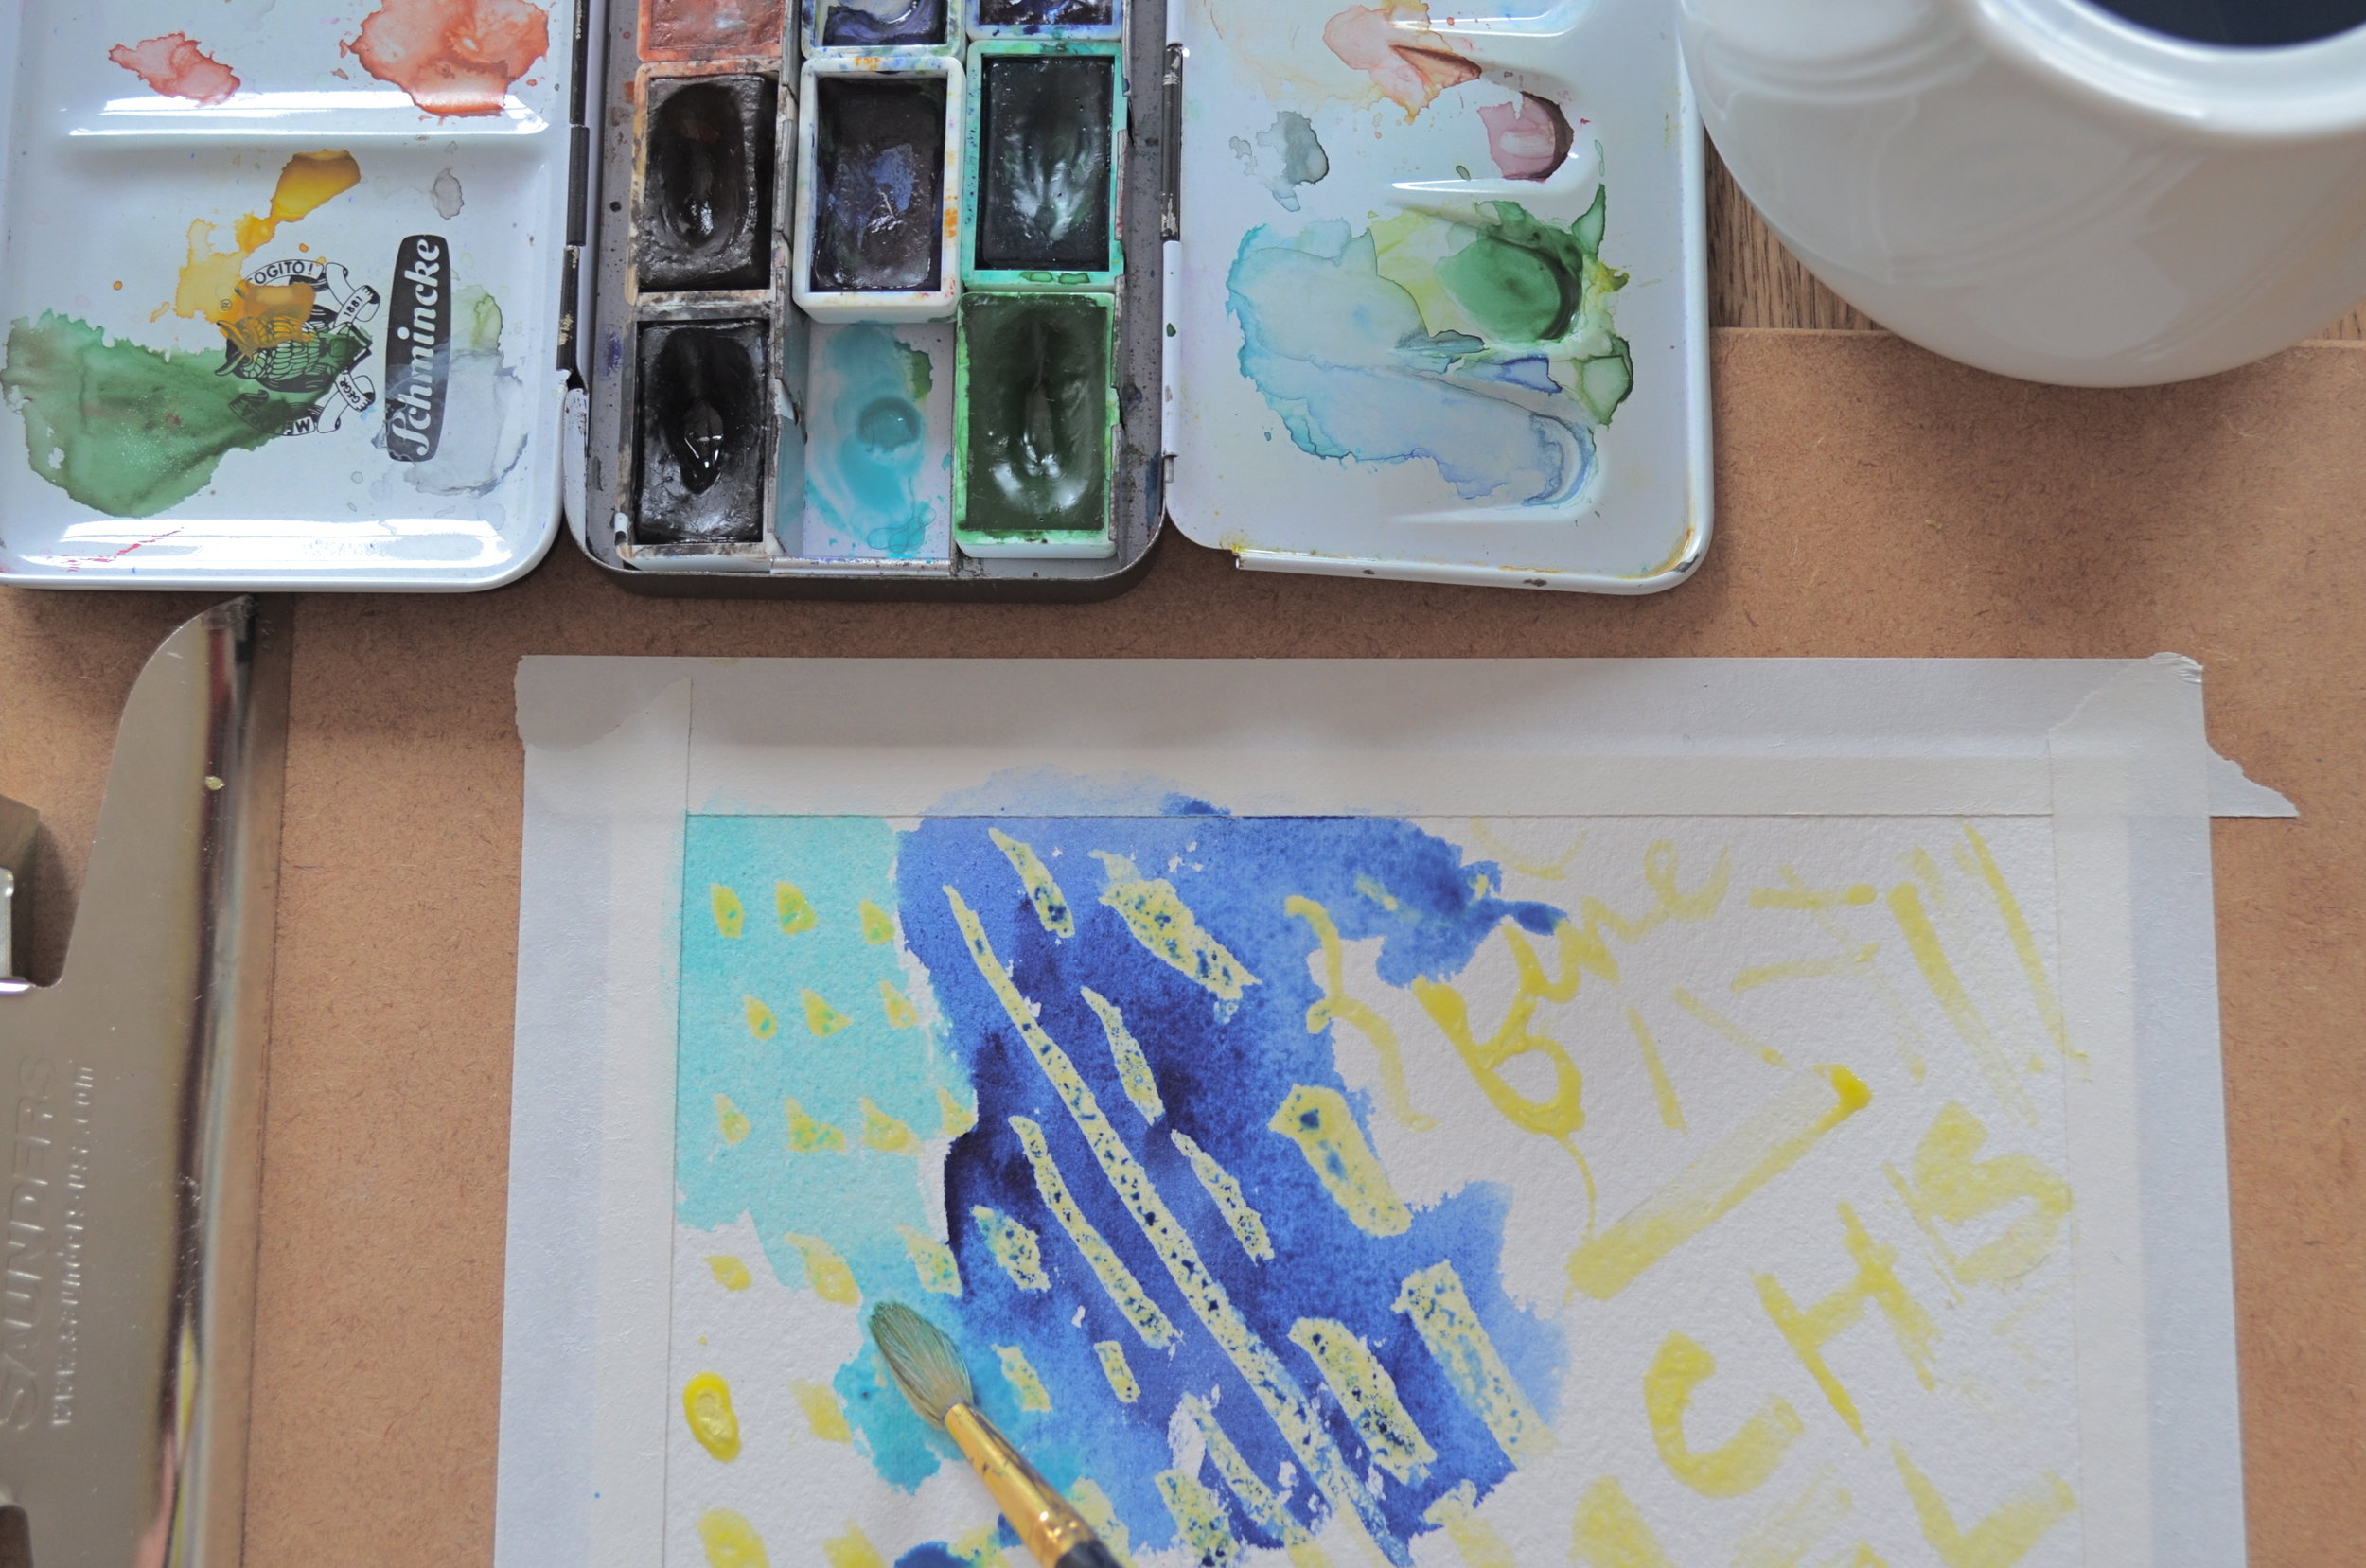
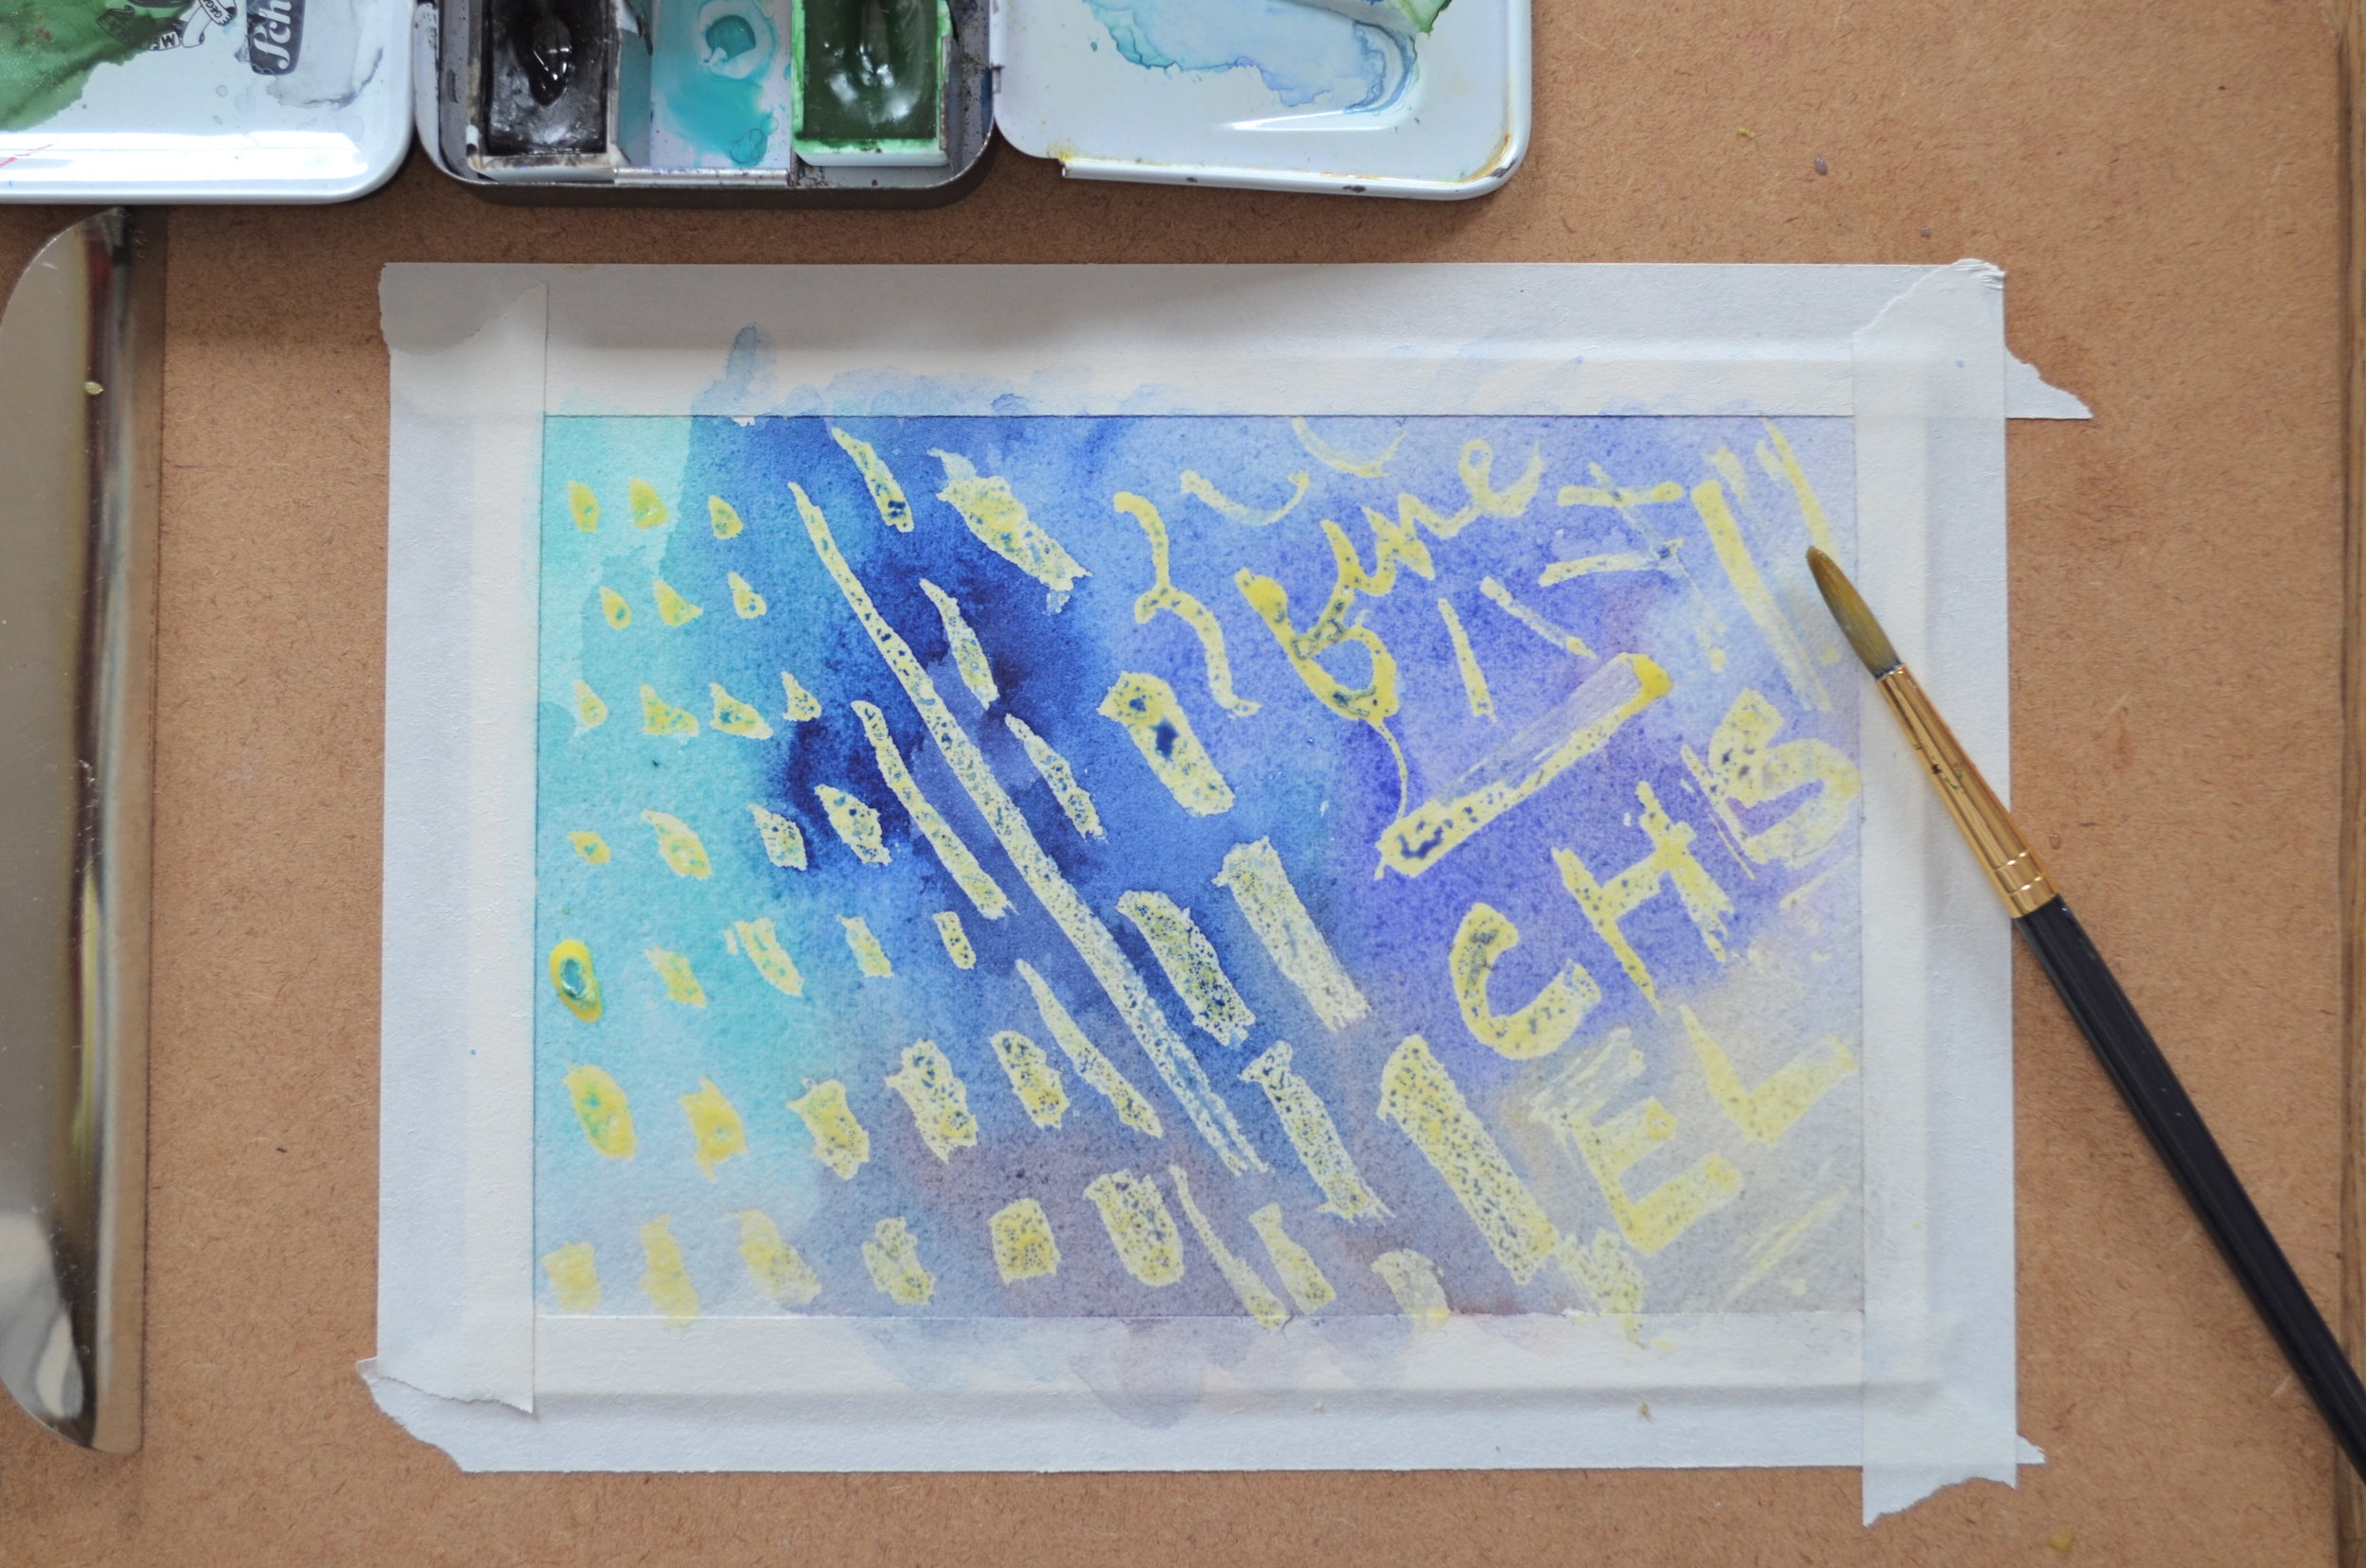
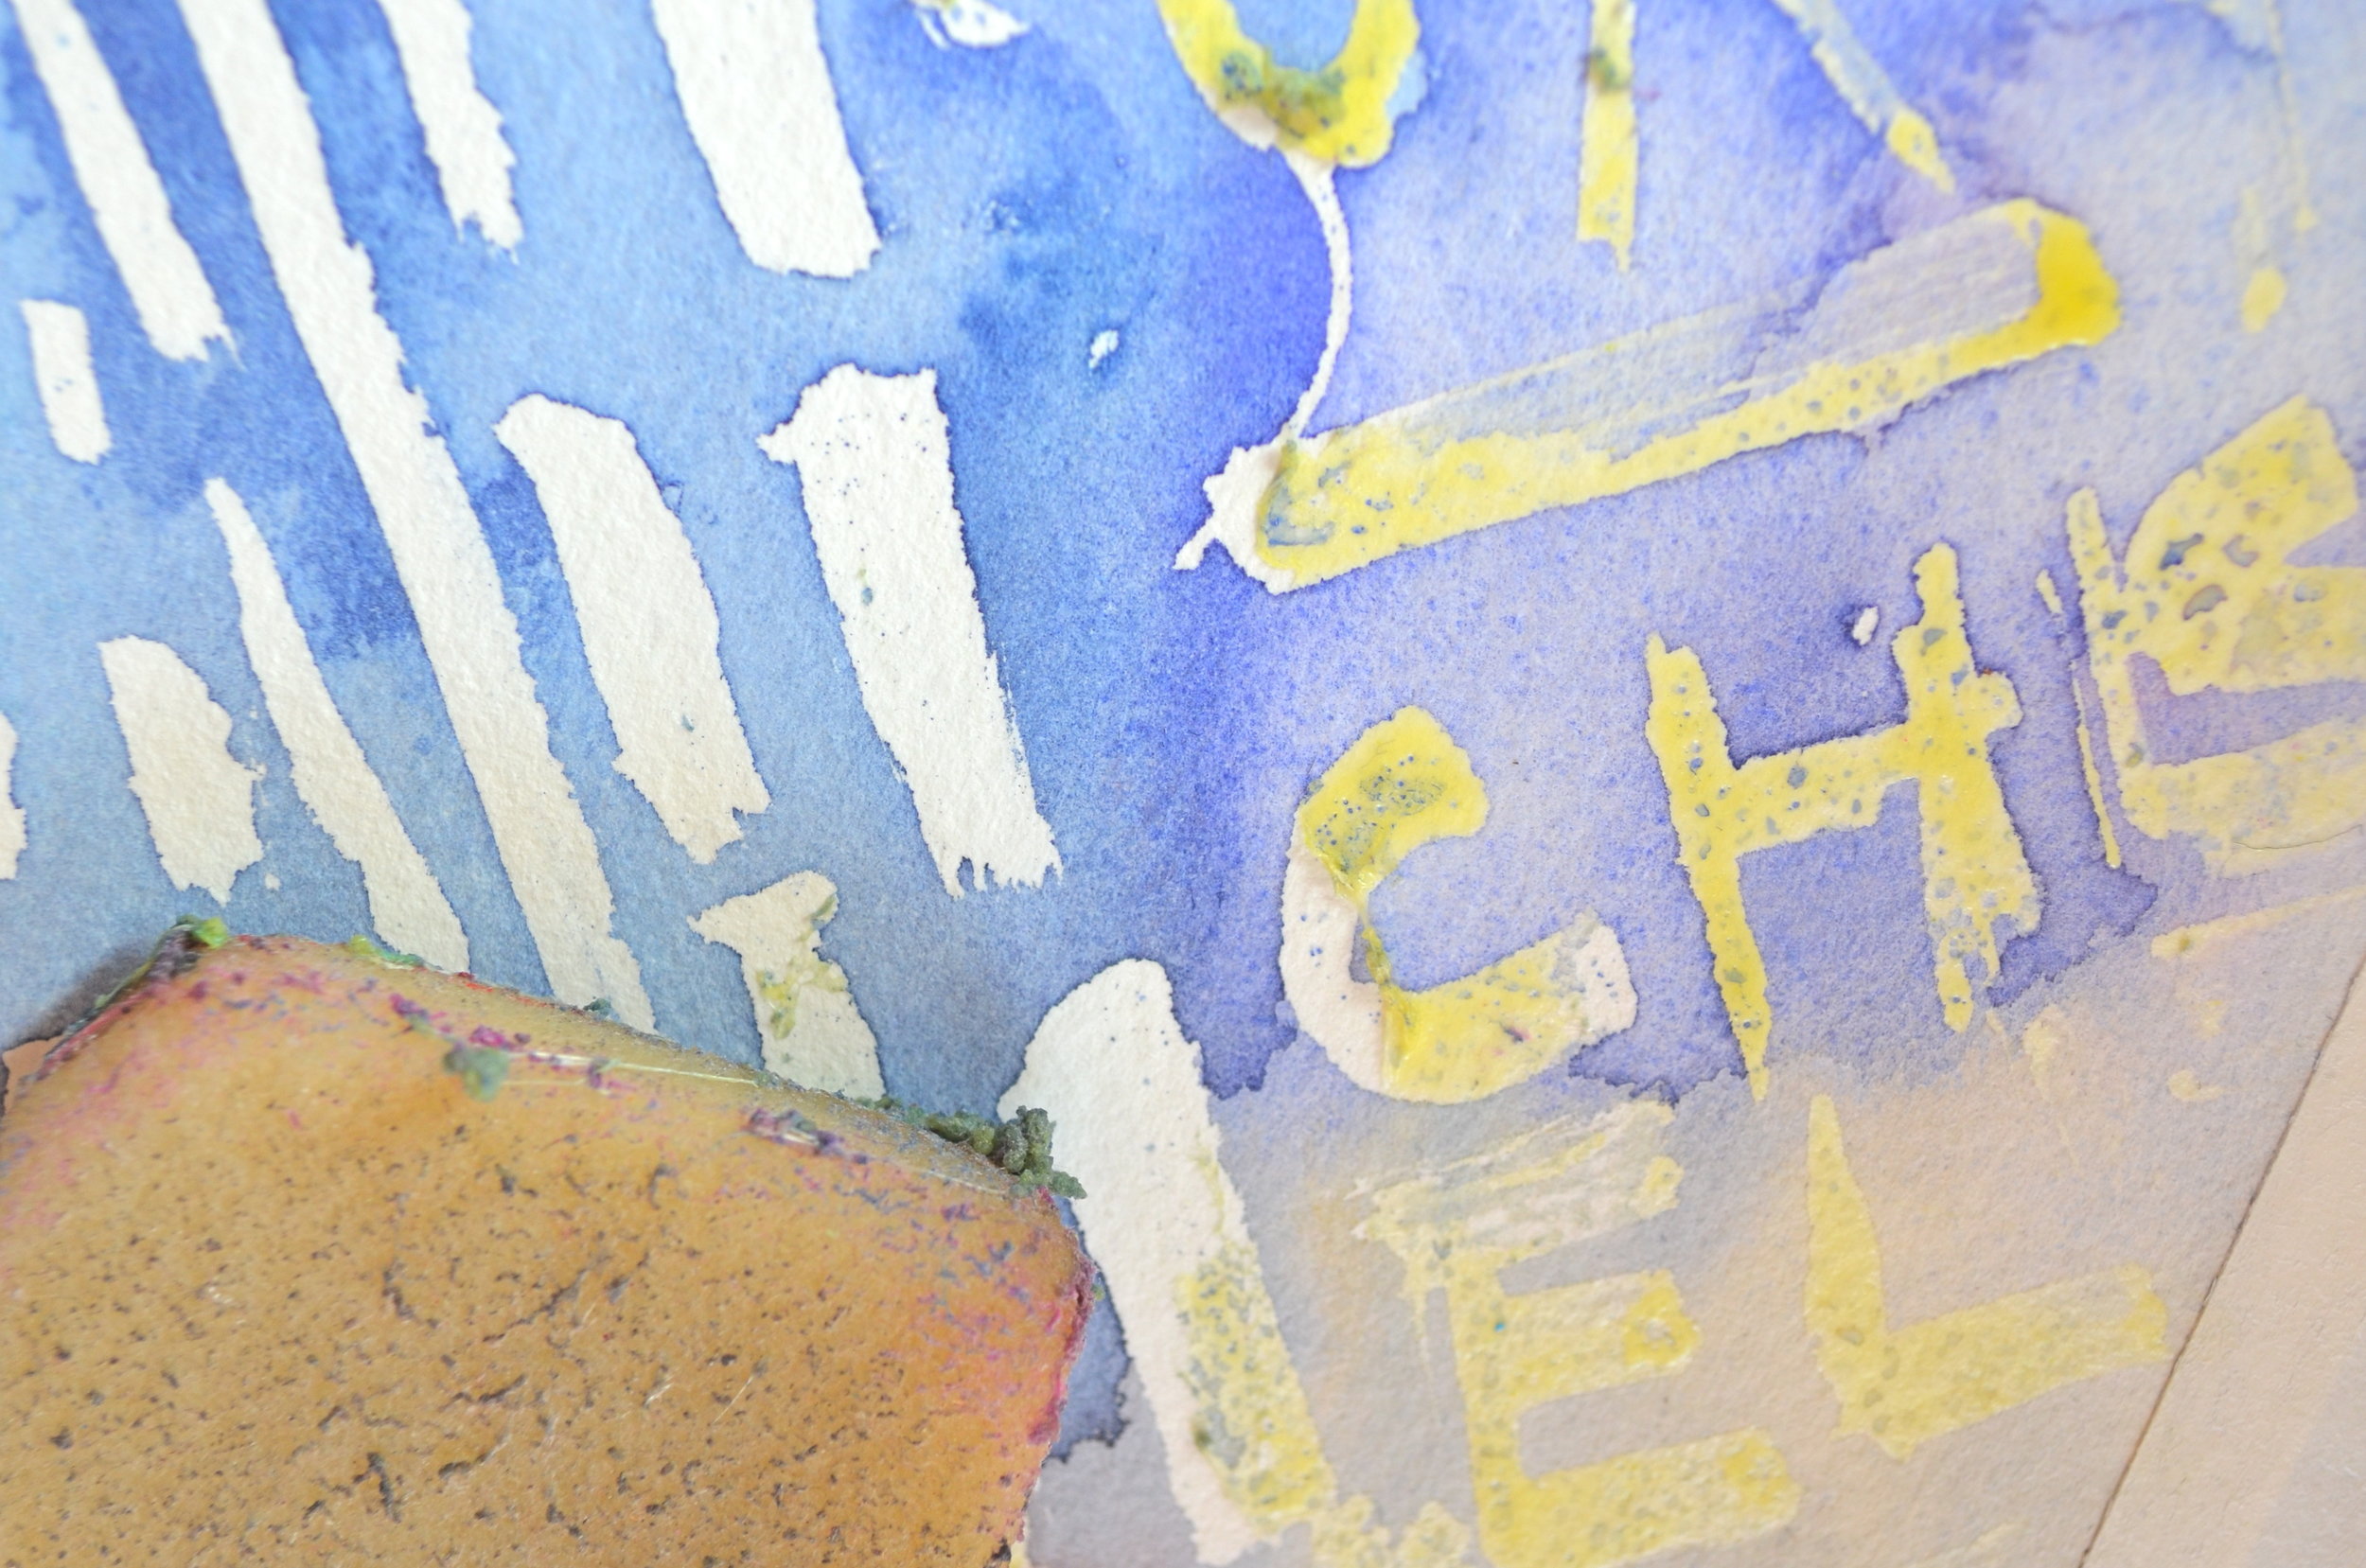
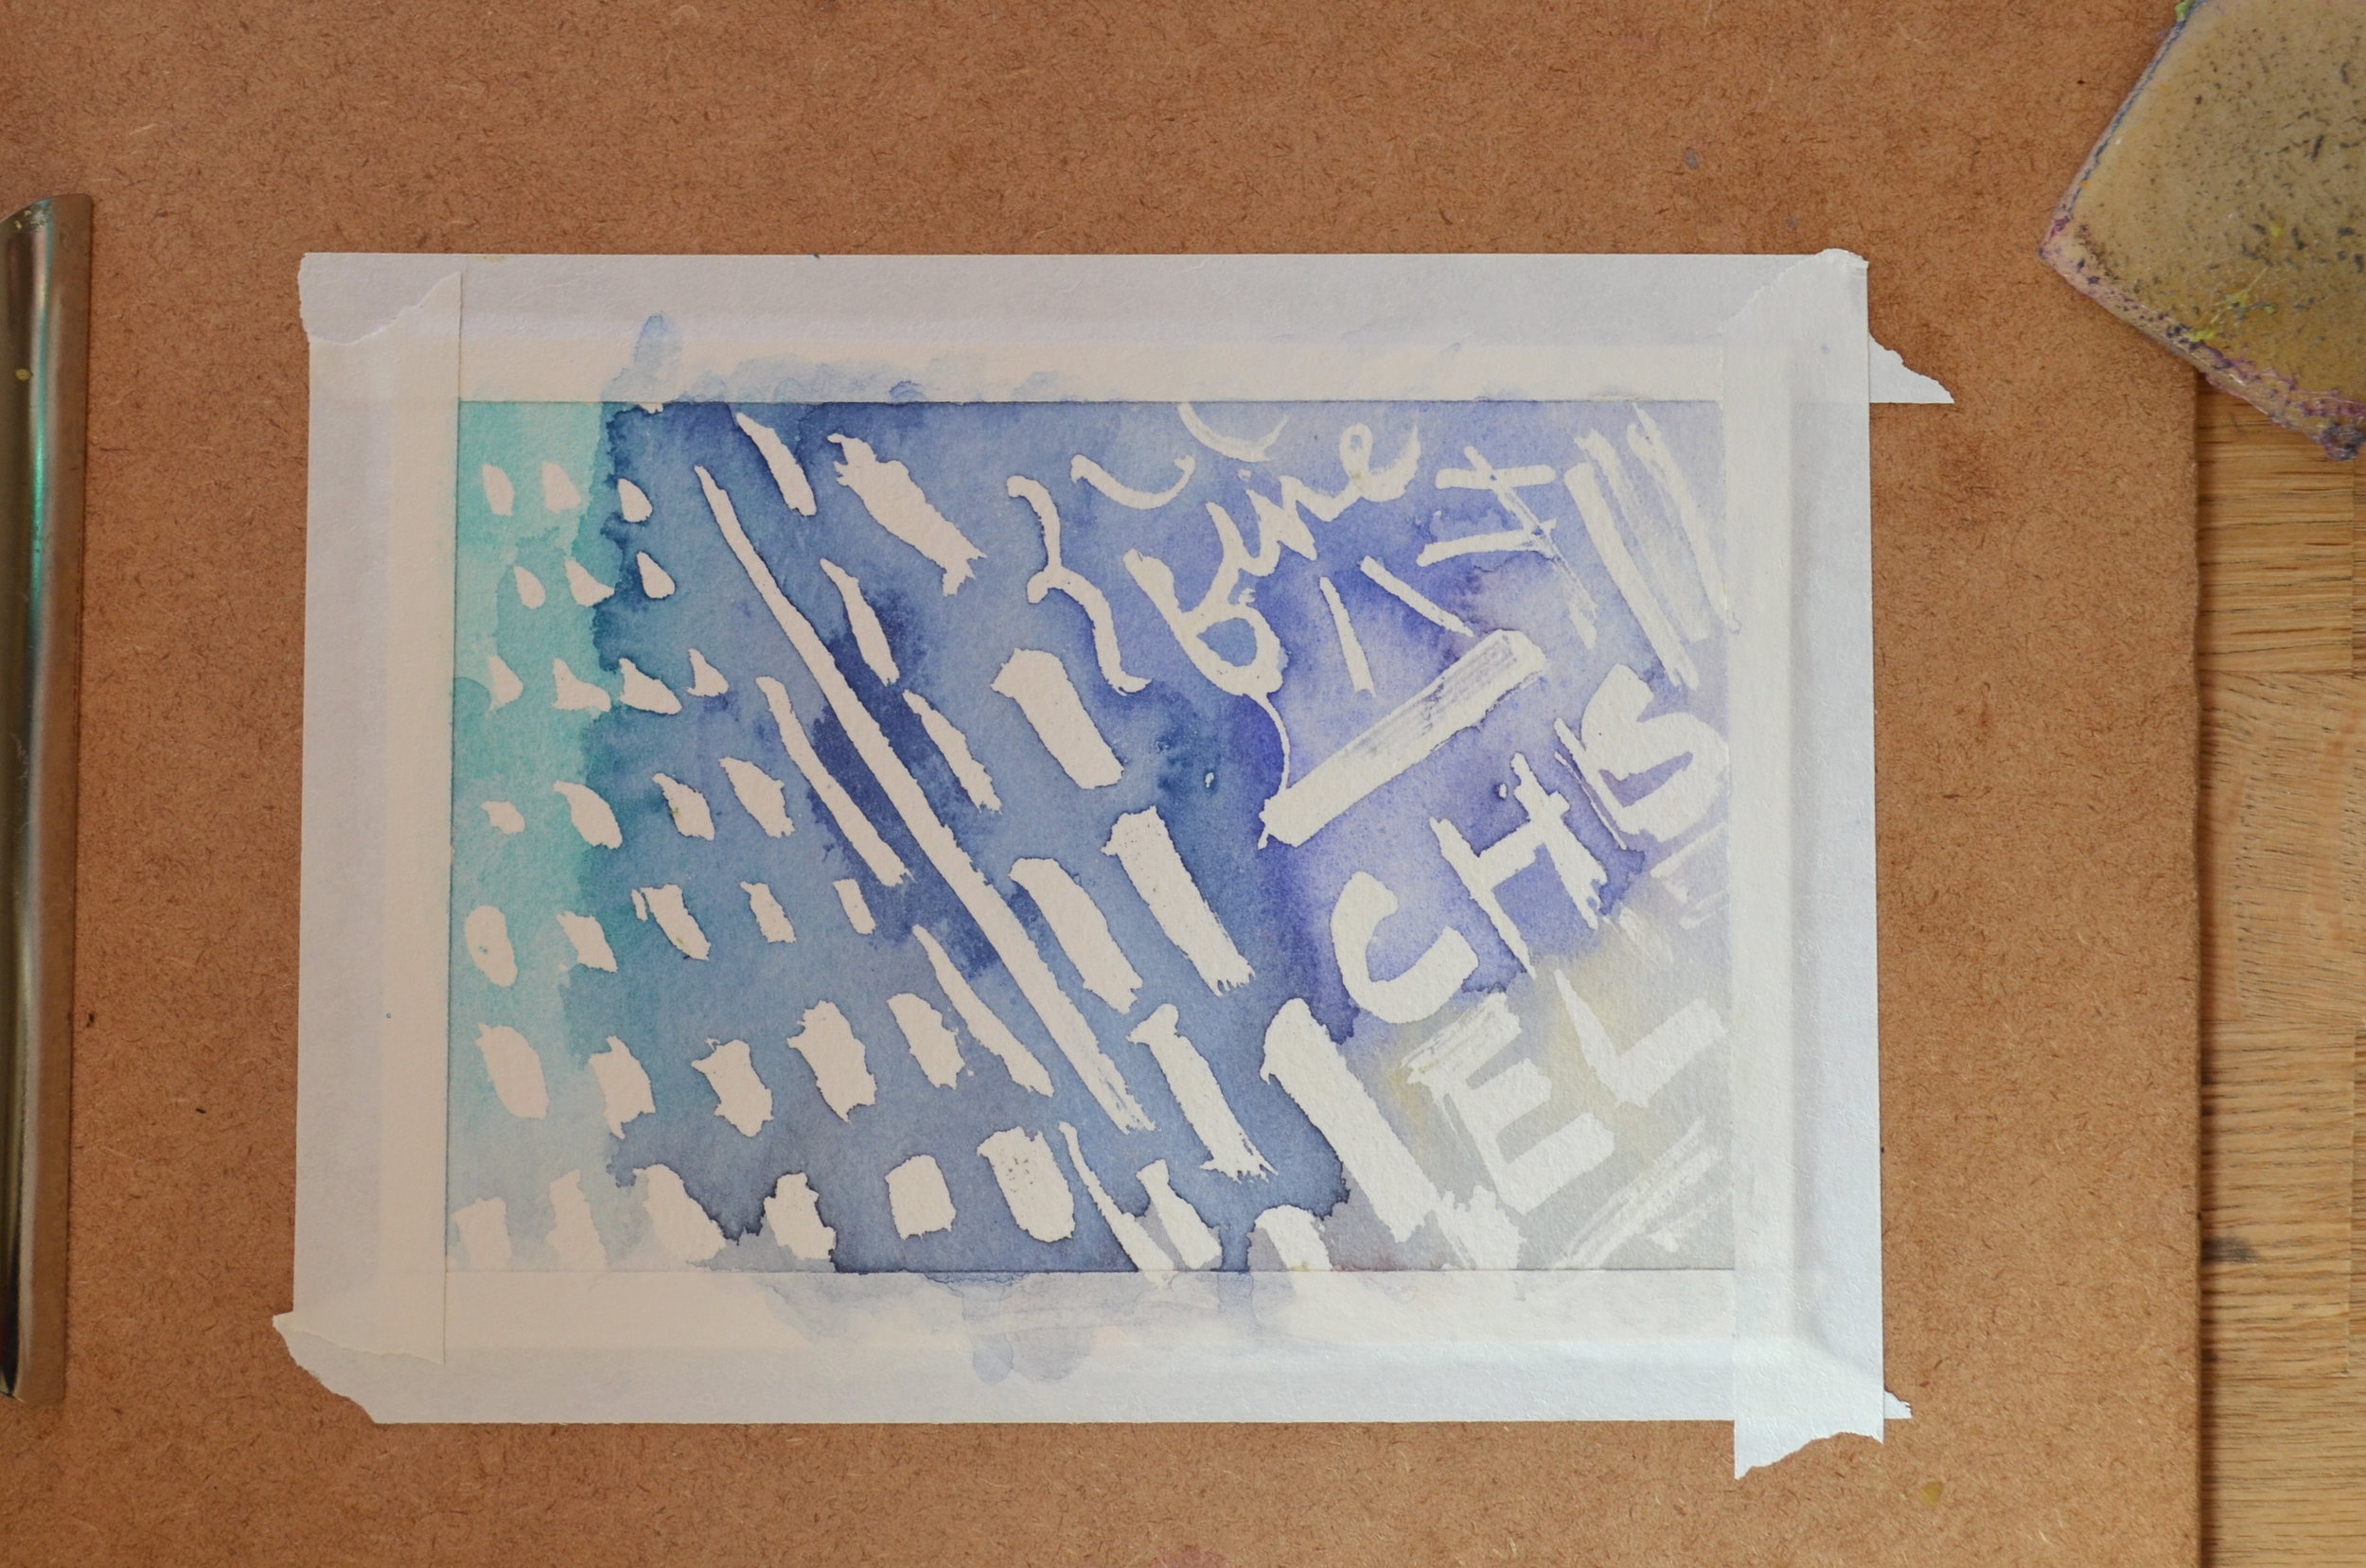
  • Blocking out small areas of white in order to get a smooth wash of color
  • Since you really can't paint lighter than the paper, you can preserve it for highlights for still lives, landscapes, and cityscapes
  • Mark making for abstract pieces, silhouettes, hand lettering, stars, etc
img_8092.jpg
dsc_0787.jpg
dsc_07921.jpg

Supplies Needed: 1. Masking Fluid 2. Rubber Cement Eraser 3. Old Paintbrush to Paint Masking Fluid With (will ruin your brush - use a crappy one) 4. Paintbrush to Paint With 5. Watercolor Paper 6. Artist Tape 7. Watercolor or Inks 8. Masking Fluid Nib 9. Water

Supplies Needed: 

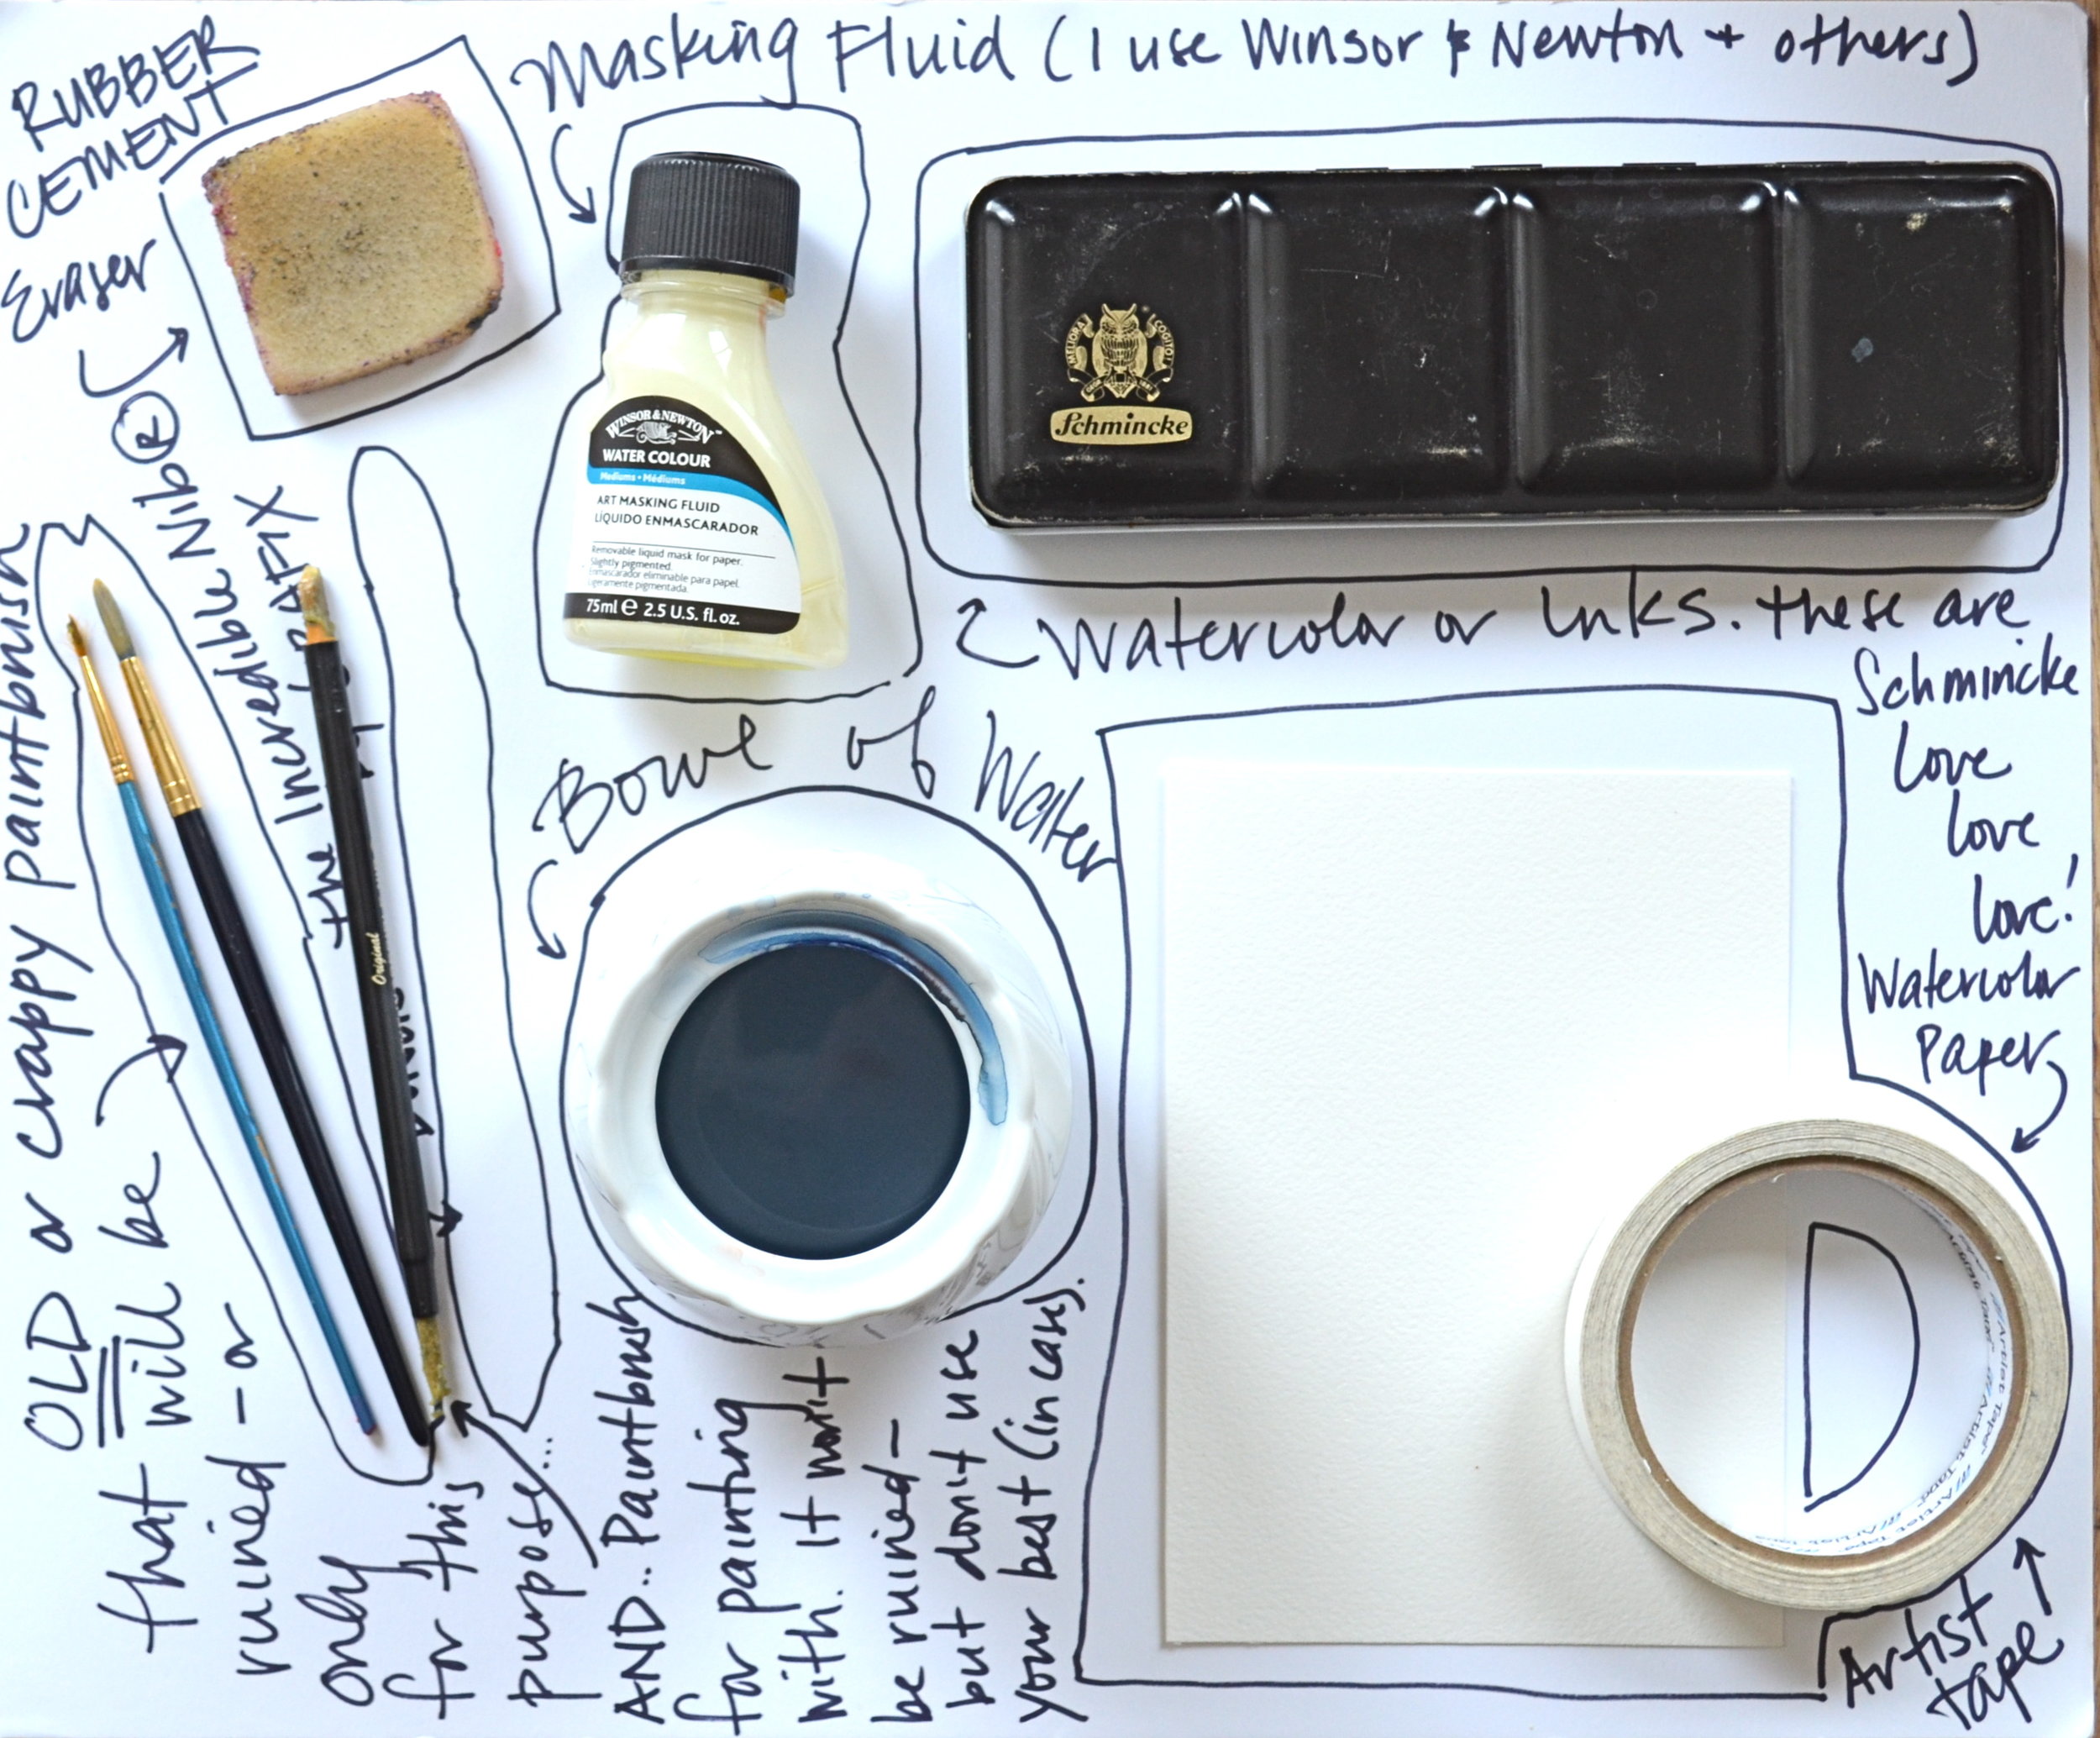
Really, you just need the fluid, something to apply it, paper, and water. Bonus items have an asterisk.

1. Masking Fluid: I use Winsor & Newton Art Masking Fluid or Pebeo Drawing Gum. For tiny, intricate details, you may prefer a masking fluid pen*.

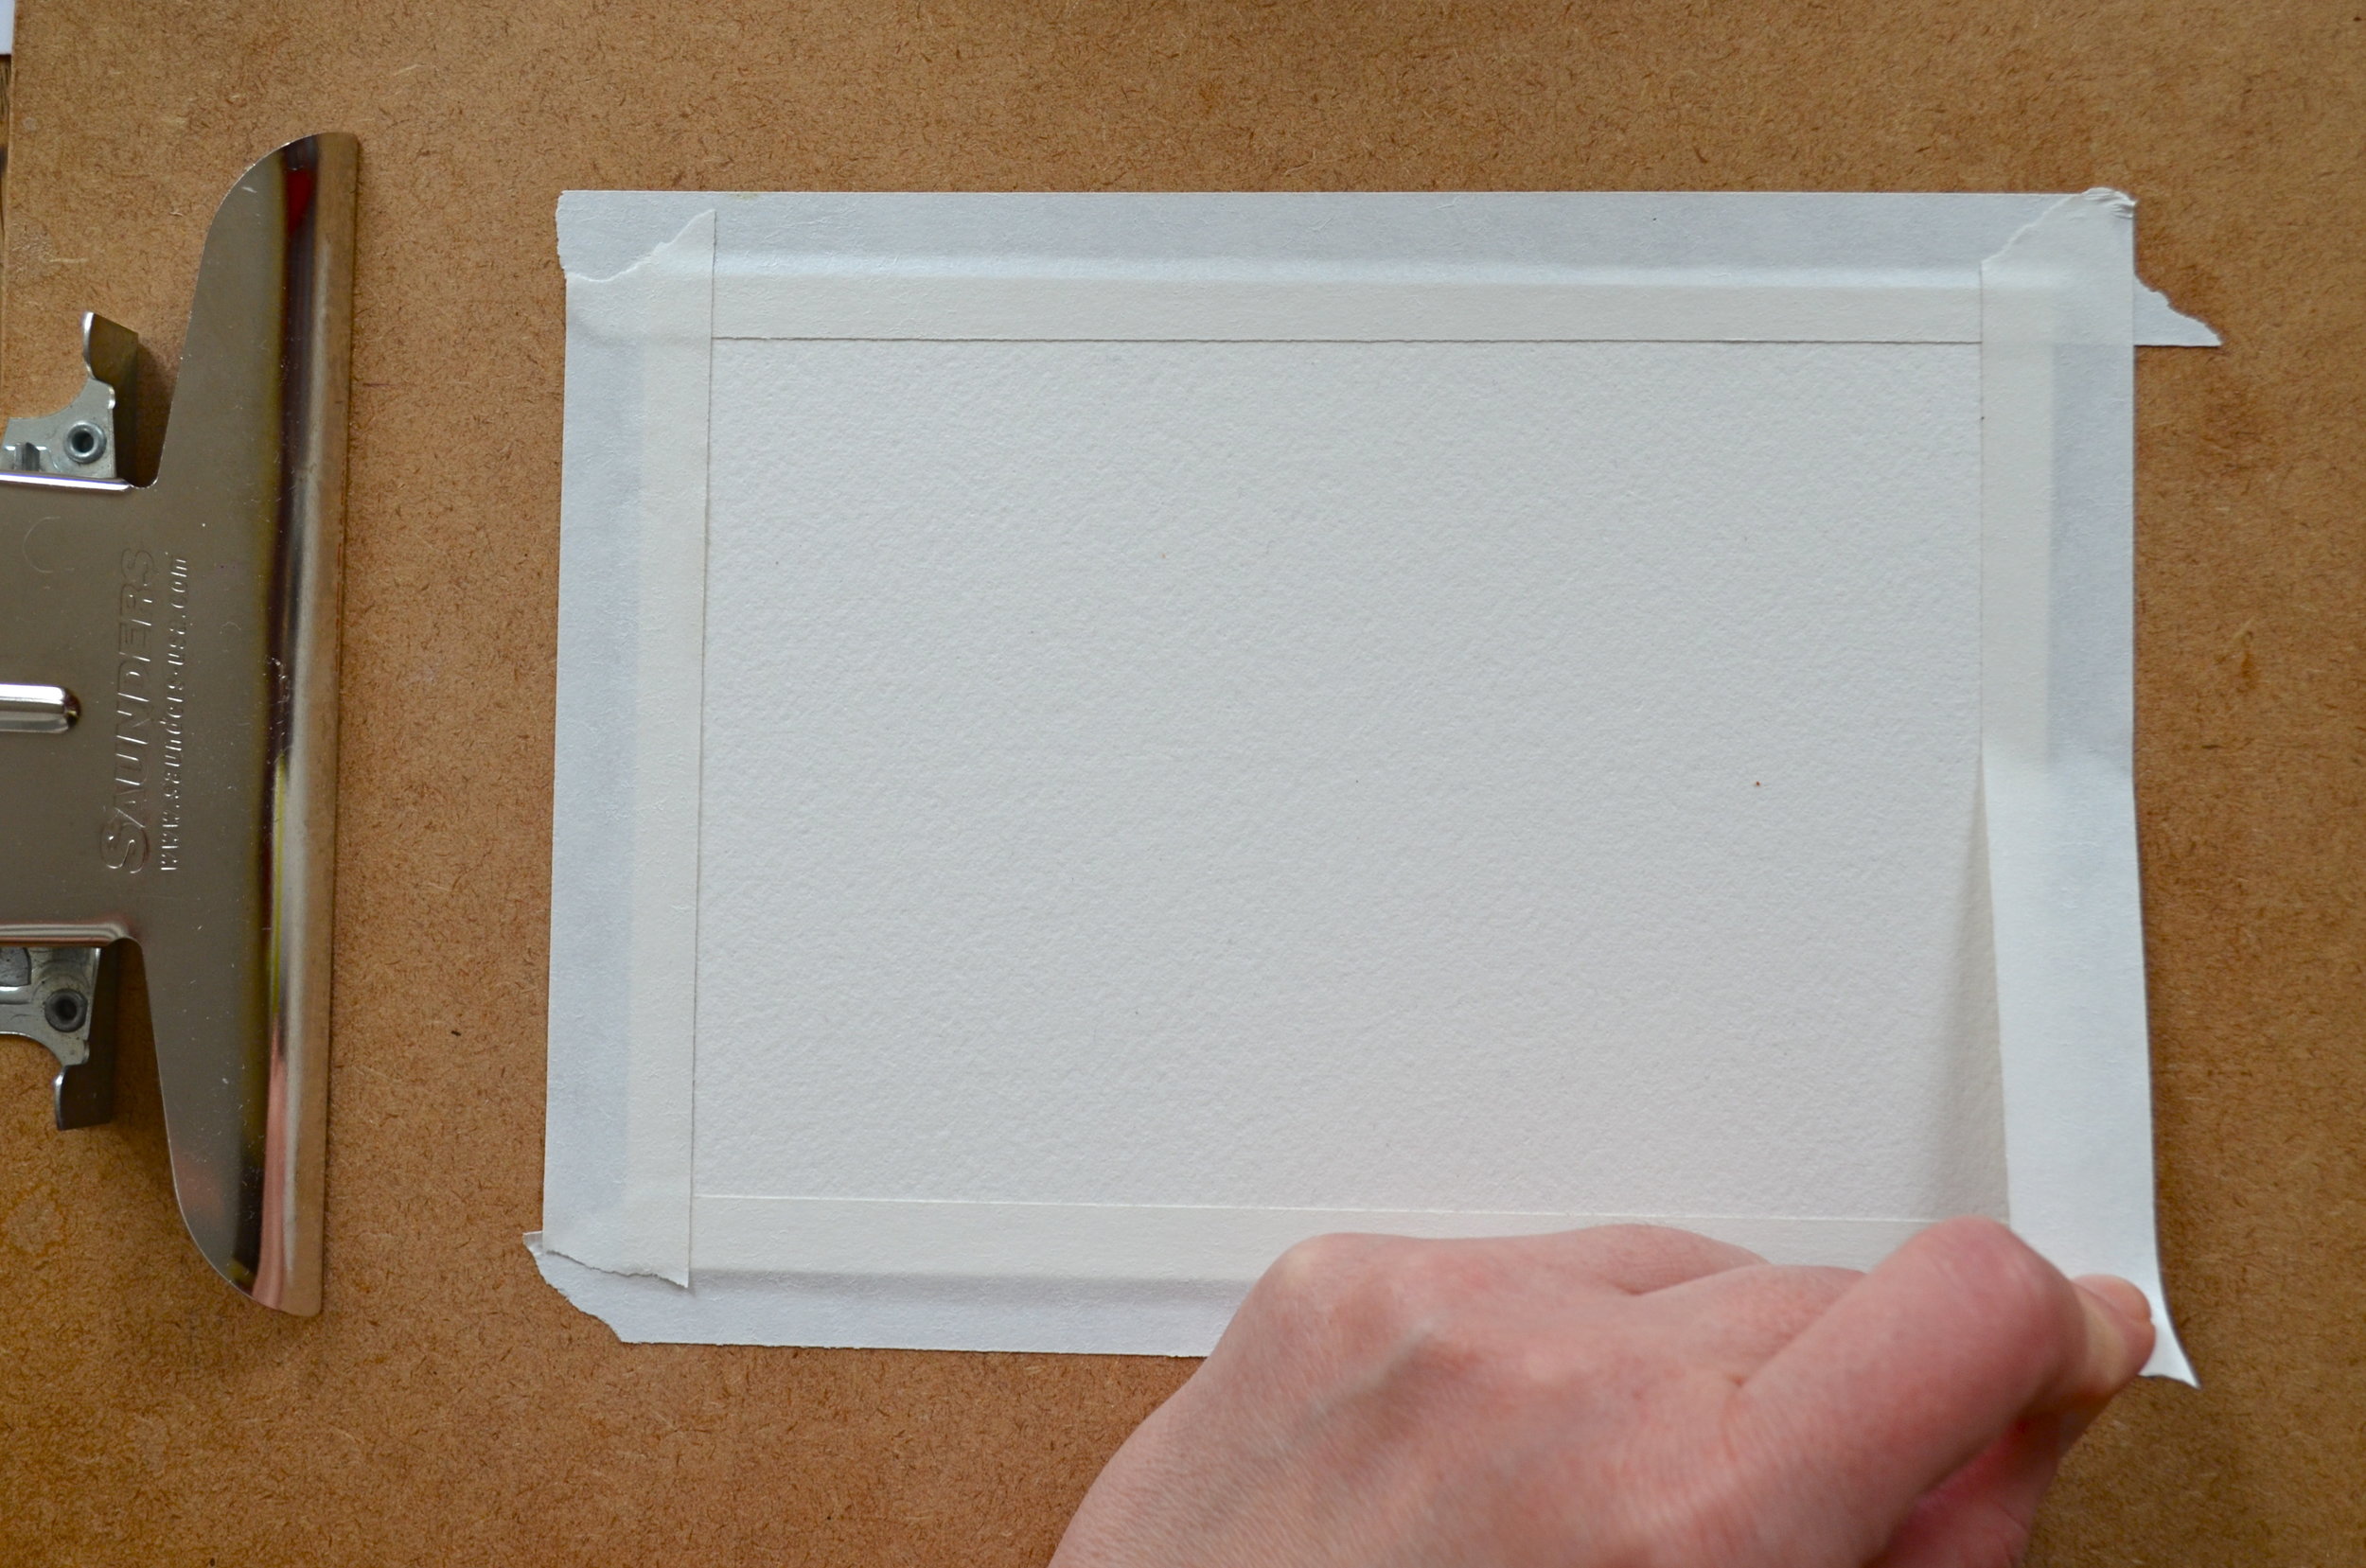
2. Watercolor Paper: I am partial to Arches 140 lb paper in cold press, but any paper will do.

3. Watercolors: Whatever you have will do, pans or tubes. I used my Schmincke Horadam Aquarelle (artist grade) set here.

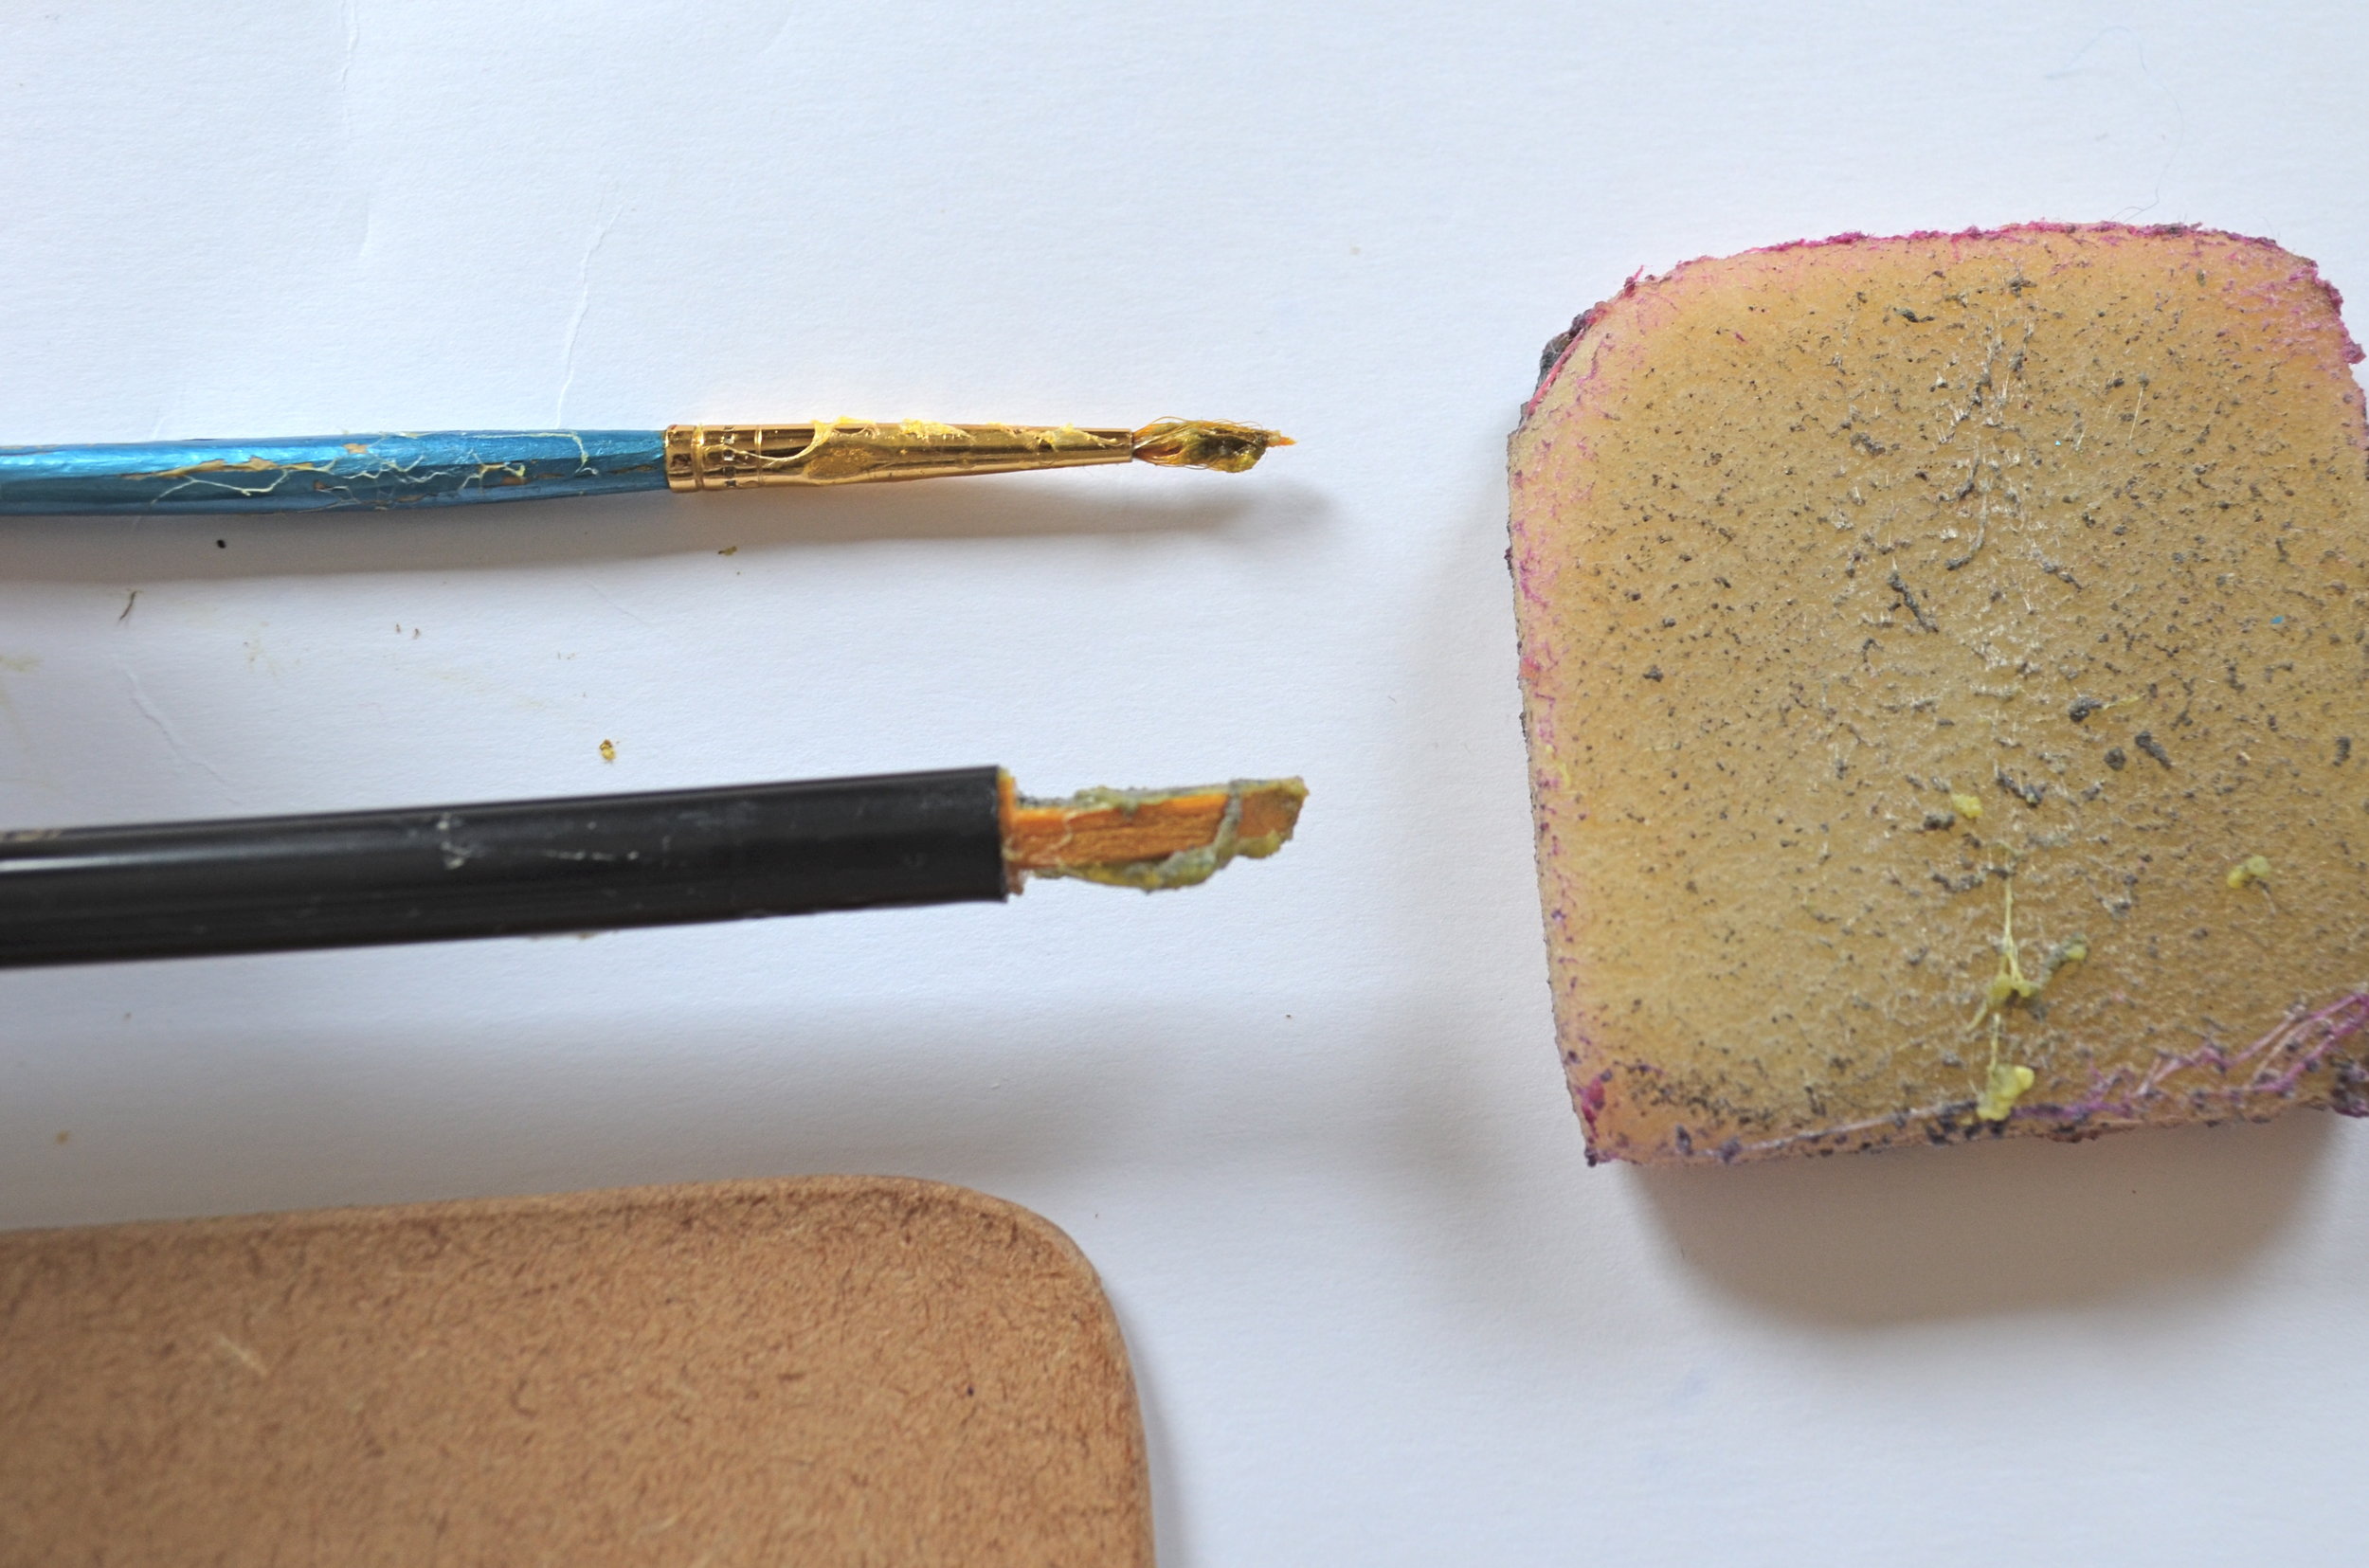
4. Something to Apply the Masking Fluid: I recommend a cheap synthetic brush that you don't mind ruining, or will assign just for this purpose. Some directions say you can wash off the masking fluid, but it's a latex based solution and can sometimes be hard to get off. Just to be safe, I use a 99 cent type brush that is pretty small. You can also use Q-tips, toothpicks or anything else. I do love my Grafix Incredible Nib* that is specifically made for this purpose, has a pointed tip and a chisel edge.

5. Artist Tape*: I use Artist Tape to create a border around my work (which is the same principle as the masking fluid by the way).

6. Rubber Cement Eraser*: These rubber cement erasers are handy and last forever.

7. Water: I recommend high quality H20. Just kidding, I couldn't resist quoting The Waterboy.

8. Something to do while you wait for masking fluid and paint to dry* 


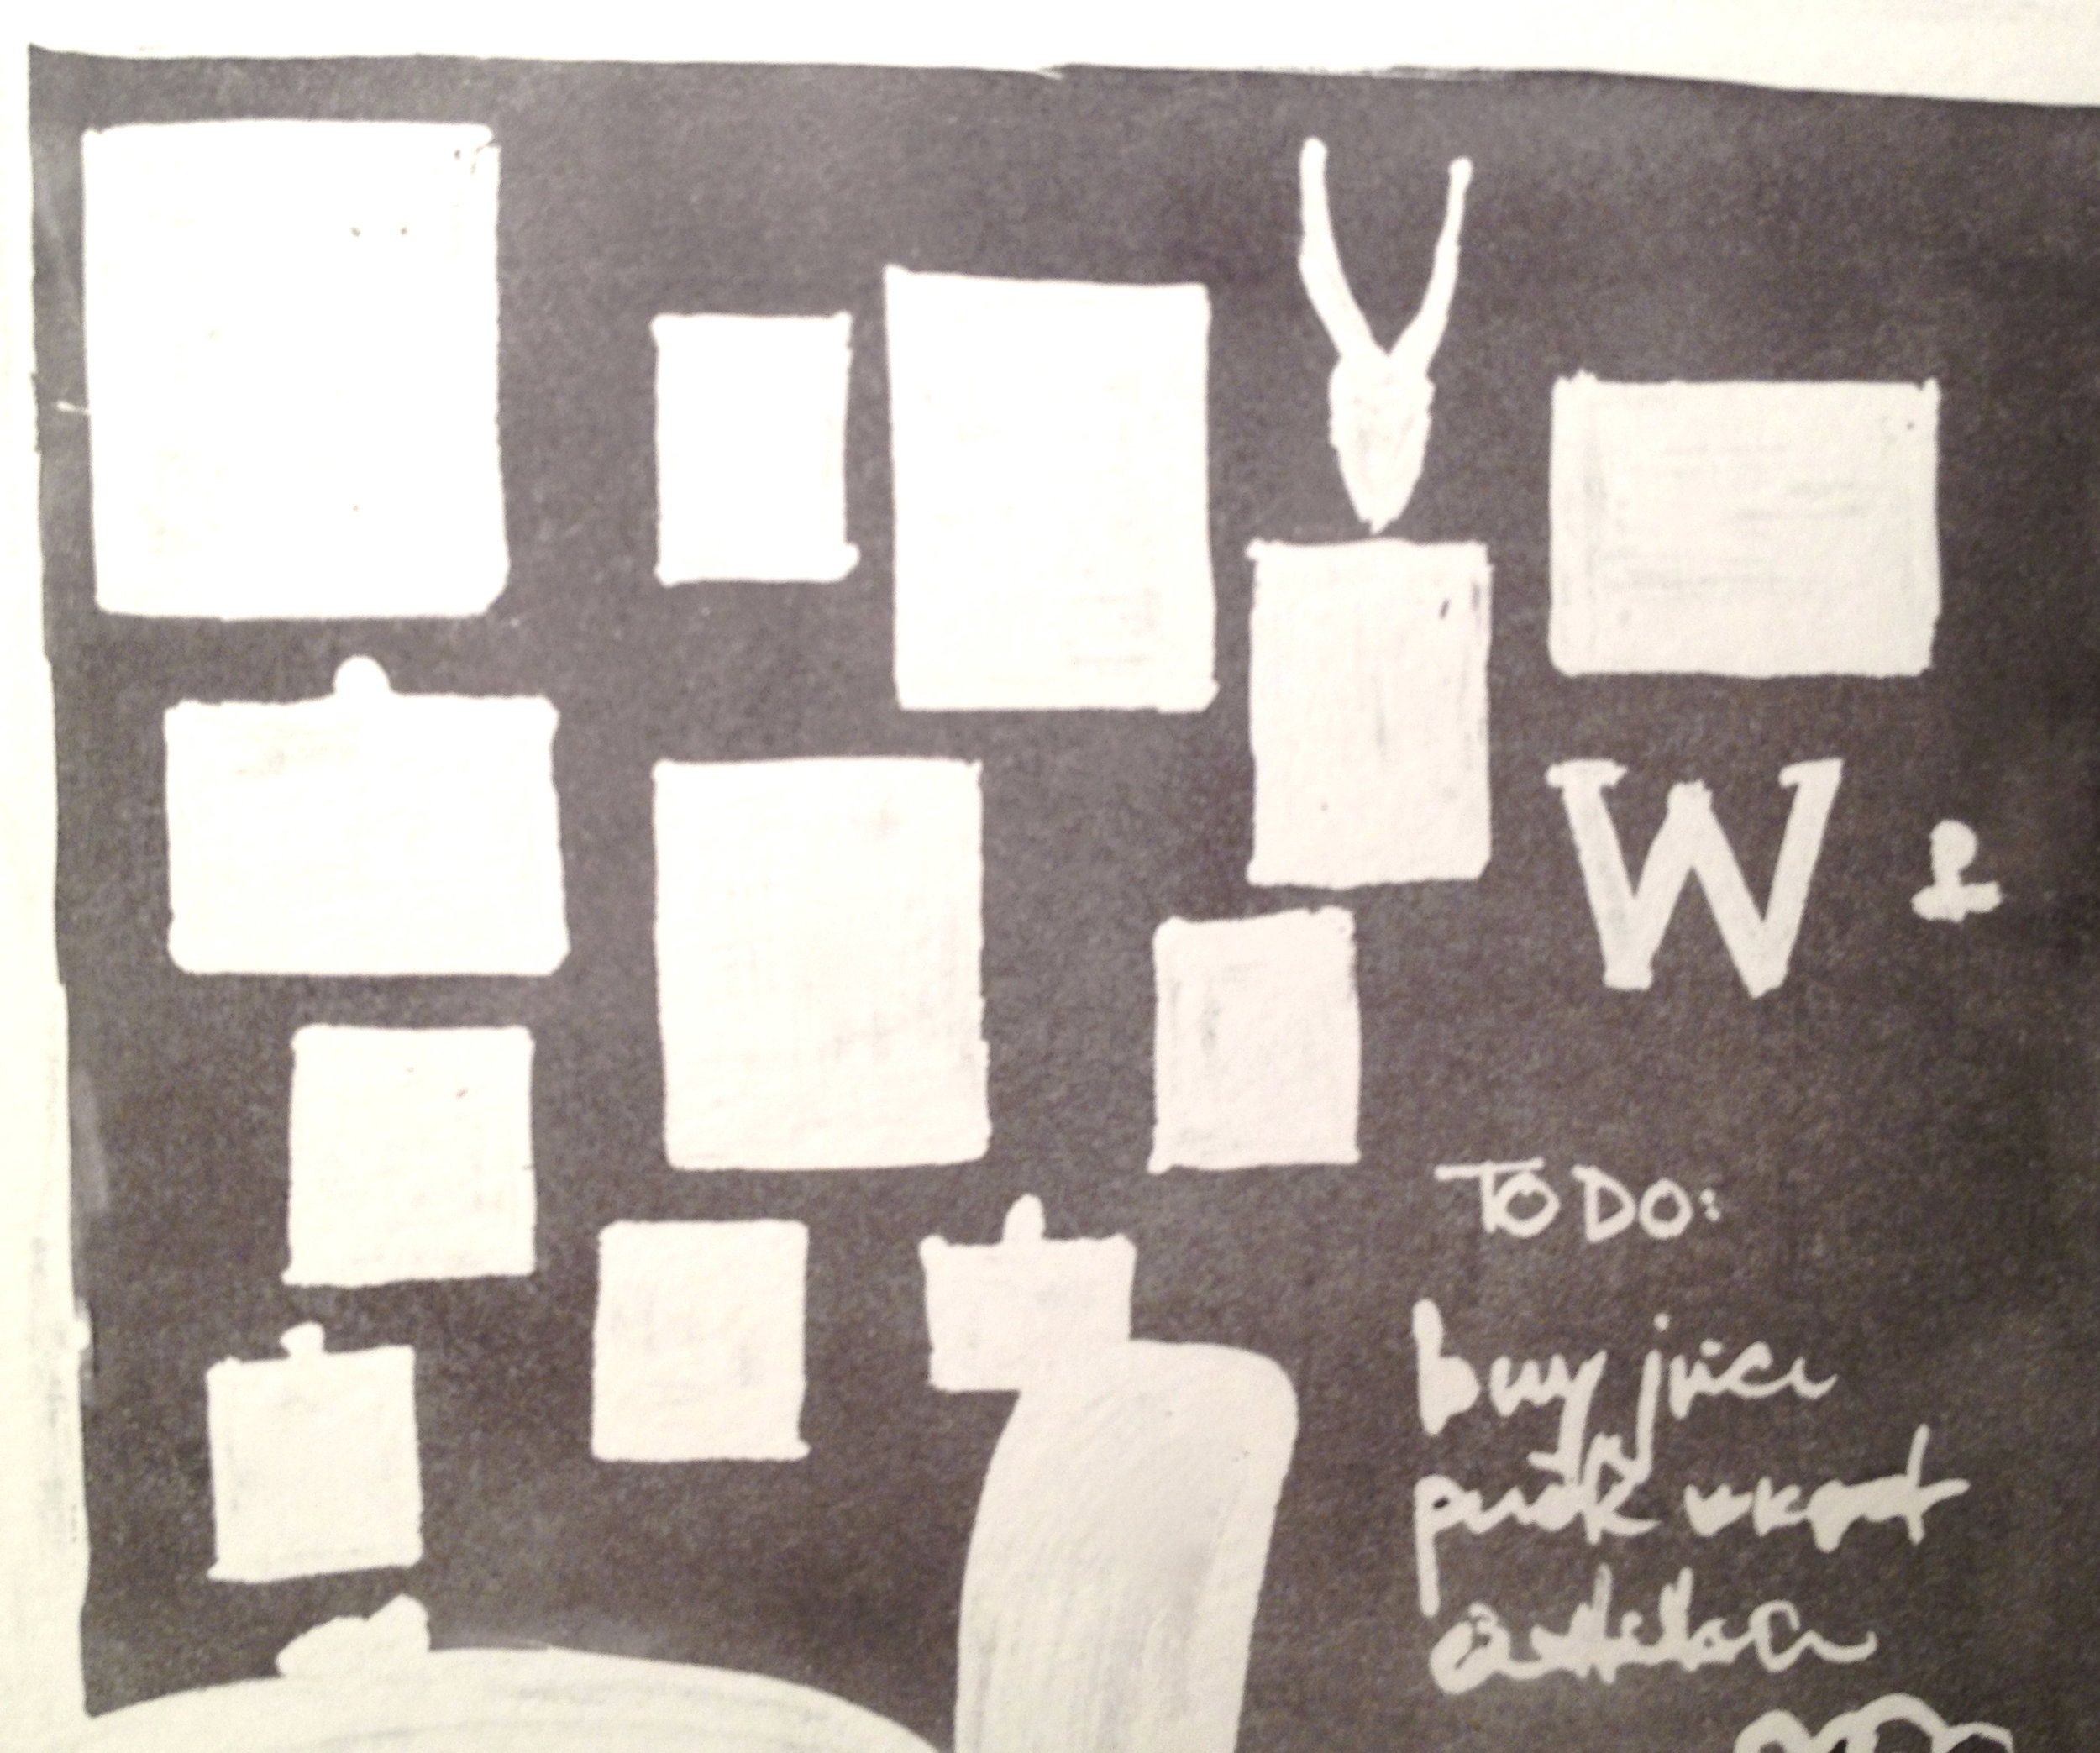
How to Use Masking Fluid: (Click on Pictures for Step by Step Descriptions)

dsc_0791.jpg
dsc_0792.jpg
dsc_0797.jpg
dsc_0799.jpg
dsc_0800.jpg
dsc_0801.jpg
dsc_0806.jpg
dsc_0807.jpg
dsc_0811.jpg
dsc_0815.jpg
dsc_0818.jpg
dsc_0819.jpg
dsc_0820.jpg
dsc_0822.jpg

Tips and Extras:

  • Masking fluid should only be applied on dry paper. If not, it will not work correctly.
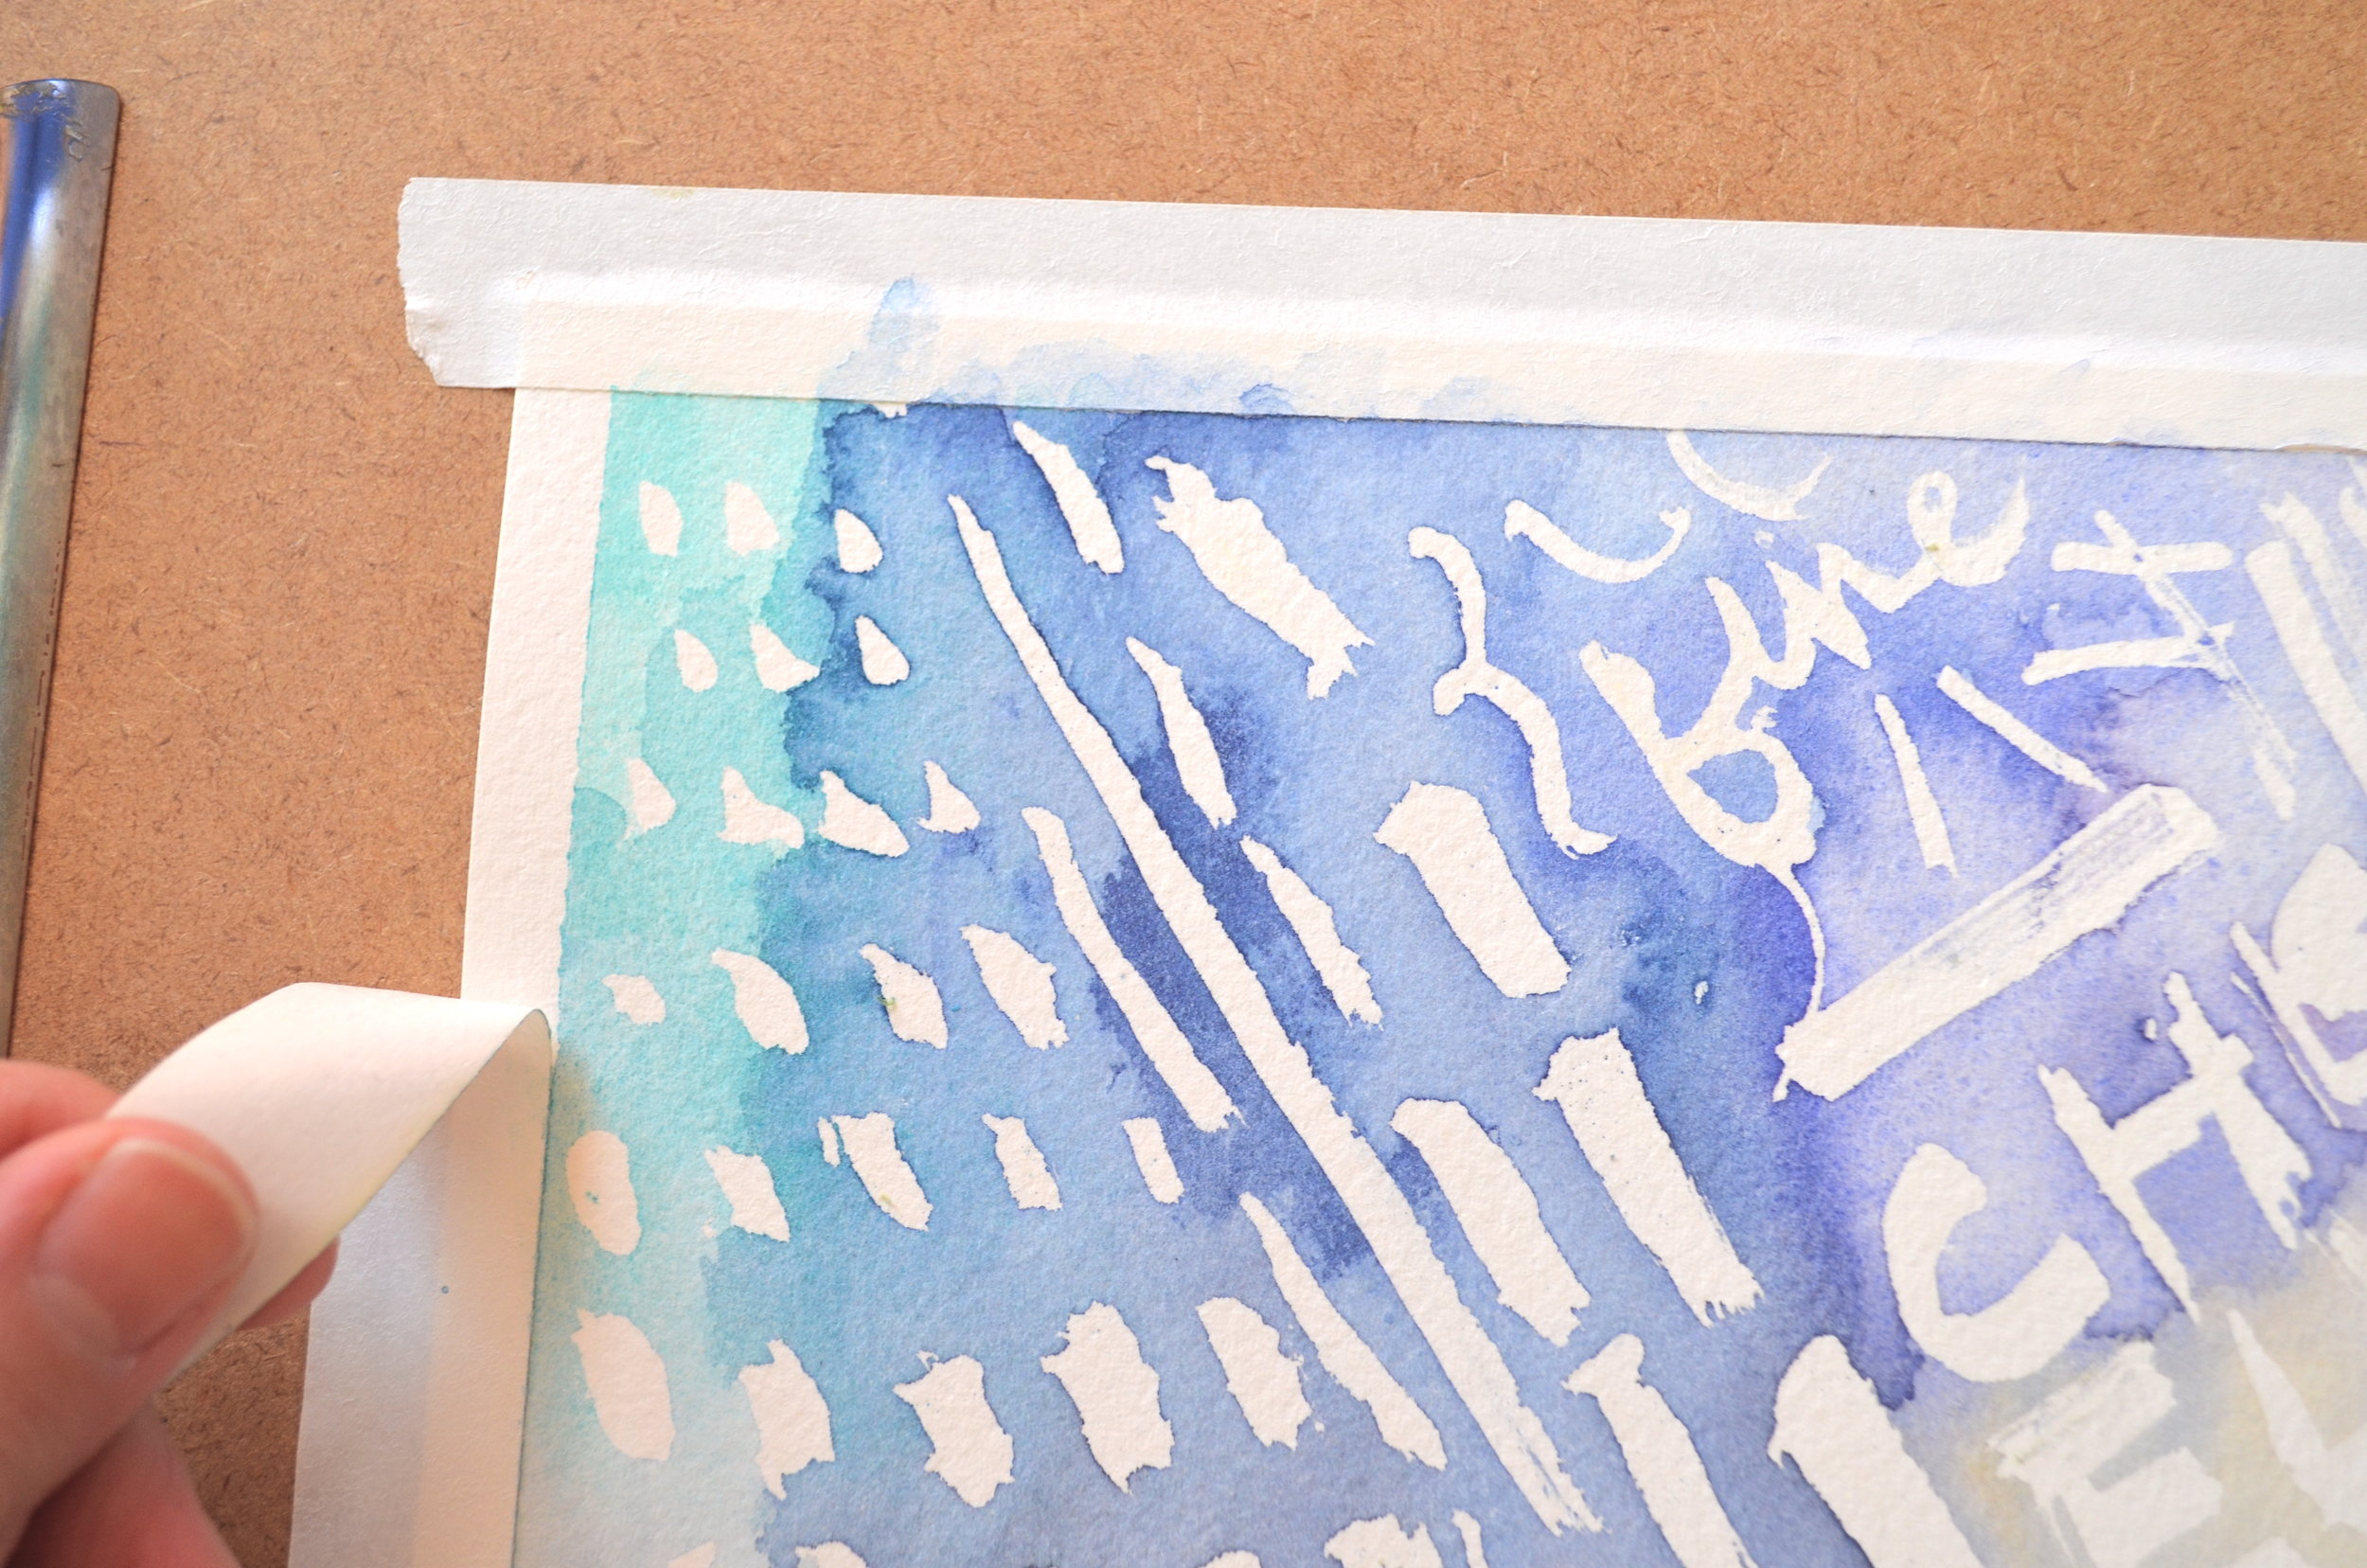
  • If you mess up an area, don't wipe it up. Let the masking fluid dry completely and peel it up.
  • The fluid needs to dry thoroughly or it will not work. Plus it can stain the paper if you smear it when it's not dry.
  • Remove the masking fluid at your earliest convenience, but don't worry too much. Depending upon my schedule, I usually leave it on for about 20 minutes, or up to a week with no trouble. I only encountered it once, but masking fluid can stain your paper. I recommend doing a test first, especially if you have an important project or deadline. I think hot press (smooth) paper can be less forgiving, and some masking fluids are better than others. Alternatively, I found an interior design project from 2001 which still had masking fluid on it. I removed it 14 years later with no issues.
  • If possible, don't use your best brushes over the dry masking fluid. It should be fine, but can get the slightest bit of tacky residue which is why I caution. Just be sure to wash your brushes promptly after with brush cleaner if possible
  • If you don't have a rubber eraser, just pick at the dried masking fluid and it will come off. You can use what you peel off to get the rest off easier.

Let me know if you have any questions or have your own advice to share in the comments. Tag me on Instagram @marissahuber if you make something using these new skills. I'd love to see what you create!

tags: DIY, masking fluid, painting techniques, watercolor
categories: Art + Illustration, Tutorials
Wednesday 03.25.15
Posted by Marissa Huber
Comments: 1
 

5 Ideas for Decorating Wall Space

img_2149.jpg

One of my good friends has all of these freshly painted walls in her new house, but now needs art and things to fill them. I've been mulling it over in the back of my head and finally sketched out some ideas for her. Wall Space

Idea One:

Display your favorite belongings, collections and quirky items in shadowboxes. Group things together.  I'm partial to odd numbered items when it comes to collection and repetition.  If you need inspiration from the Queen of Collections, check out Lisa Congdon's Collection a Day.

Past items I've displayed are the gold sequined beaded bag (sketched below), a lemon yellow flapper dress scored at a thrift store in Florida, and a tiara from homecoming court. What a trend, all of these things are shiny, sparkly and somewhat gaudy!

I think a collection of medals would be neat, especially if they held personal meaning. The options are endless, and it becomes art, sentiment and quirky sideshow for your guests. Go mount your beloved grandmother's old spoons, broken pieces of teacups, the burlap coffee sack you picked up in Central America. Whatever speaks to you. Be genuine!

Wall Space Idea OneIdea Two:

Frame things you have or are large. Think maps, large photographs and favorite pieces of fabric.

Maps! Who doesn't love maps? They showcase the world at different times, feed your travel lust, track places you've been, are colorful graphic images, and take up space.

You can embroider an epic roadtrip route traveled in college where your car broke down on the side of a mountain in Utah (moi), track a honeymoon trip, or pin places you want to go. You can use the actual map as a canvas for the shape of a favorite state. Purchase or create an illustrated map for a favorite destination or to document an event or trip.

Wall Space Idea Two

Utilize your thousand megapixel camera finally and blow up your travel photos, still lives, or portraits. You can go as big as The Novogratz's do with wall paper, or you can aim for 24x36. Or buy a print of some of your favorite photographers.

There is also fabric. I mounted a handmade woven piece from Peru with a dowel rod. You can frame or mount on canvas that yard of fabric you love but won't ever touch. Enjoy it everyday instead!

Idea Three:

Make your own collages using old paint chips, cut paper, magazines, old books, etc.  If you're artsy, make shapes and have fun. Have some friends over. Use a reference to trace a silhouette or a favorite vegetable. Do a grouping of 4 fruits or veggies for your kitchen. Paint 3 pictures of your favorite dogs that you're not allowing yourself to adopt yet. Make shapes using cut out triangles or a paper punch. Cut stripes and be random.

Frame it and enjoy. Trade with friends. Collaborate. See if wine helps or hinders. Paste over the mistakes. Hang it in the laundry room if it's an utter failure!

Wall Space Idea Three

Idea Four:

Make paintings! Same as idea three, but with art supplies. You can make a ton of colors by mixing primary red, blue, and yellow with white and black. Acrylic is easy if you've never done it, and mixes with water which everyone is used to. Trace some patterns, mix up some colors and make simple piece of art that you are proud of.

Idea Five:

Invest in artists (established or emerging depending on your budget), that you love.  Purchase photographs, prints, letterpress, screen-prints, illustrations, printed linen, whatever you want to look at daily.

I always think you should buy art that speaks to you, that makes you smile or feel something each time you walk by. Of course I live with a painter, so our walls are filled gallery style, but I still smile each time I see my beloved Heather Smith Jones piece or the watercolor from my friend Margaret's travels to Alaska in the 70s.

Wall Space Ideas Four & FiveHere are some resources and a few of my recent favorites to get you started:

  • 20x200
  • Etsy
  • Big Cartel
  • Michelle Armas
  • LALADexPress
  • Claudia Pearson
  • Julia Rothman
  • Lisa Rupp Designs
  • Mike East (have to add my partner-in-crime)

Regardless of what you choose to fill your home, enjoy doing it, know that it's a process, and bring things and art in that you love. Let me know what I forgot!

And have fun! Life is short and artwork can be rearranged.

(Says the girl with an alligator head and pink lawn flamingos).

tags: 5 Tips, art, create, decorate, DIY, ideas, interior design, photos, walls
categories: Design, Home
Wednesday 01.18.12
Posted by Marissa Huber
Comments: 5
 

Powered by Squarespace.